

Here’s a guide on how to set up Woocommerce Stripe Payment Gateway.
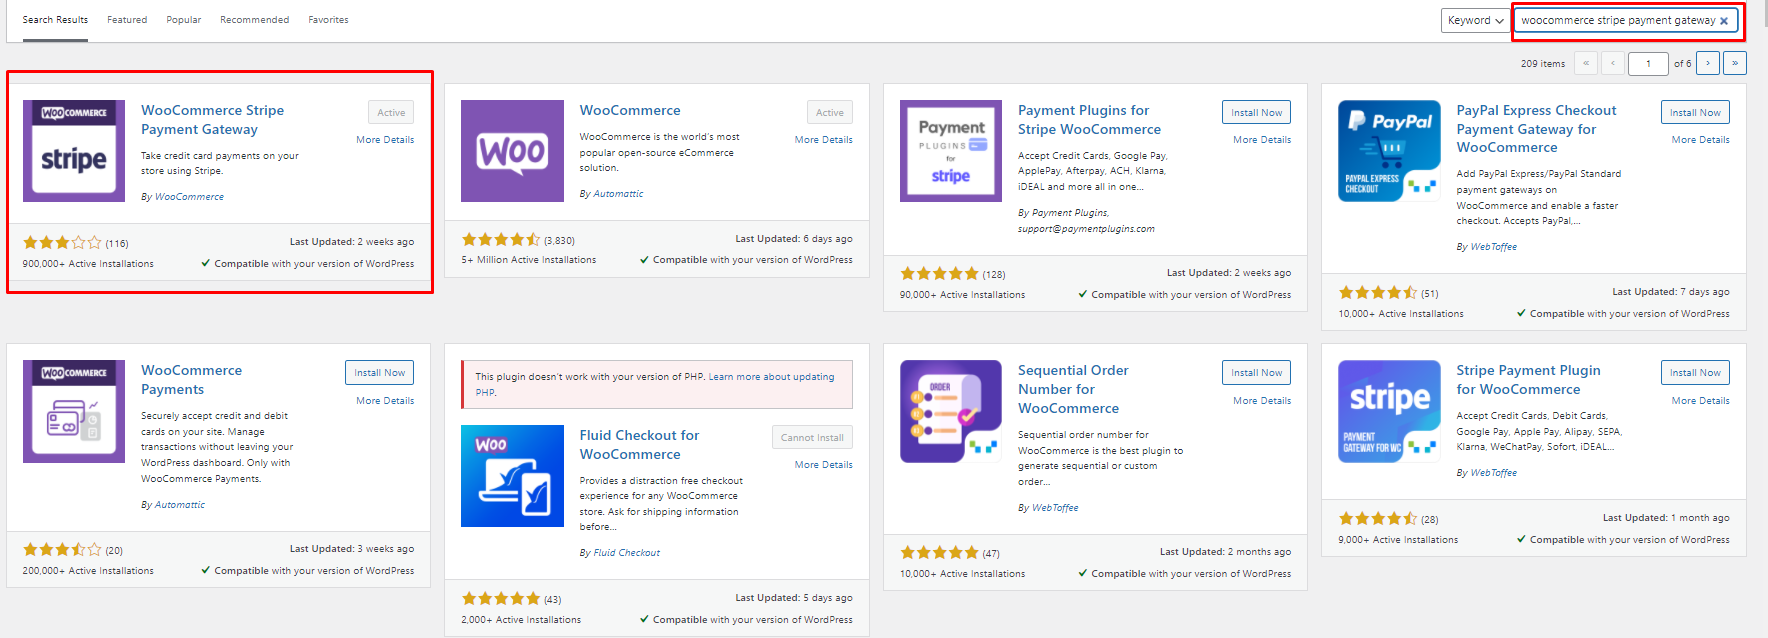
Step 1 – Installing the plugin
- In the search bar, search for Woocommerce Stripe Payment Gateway
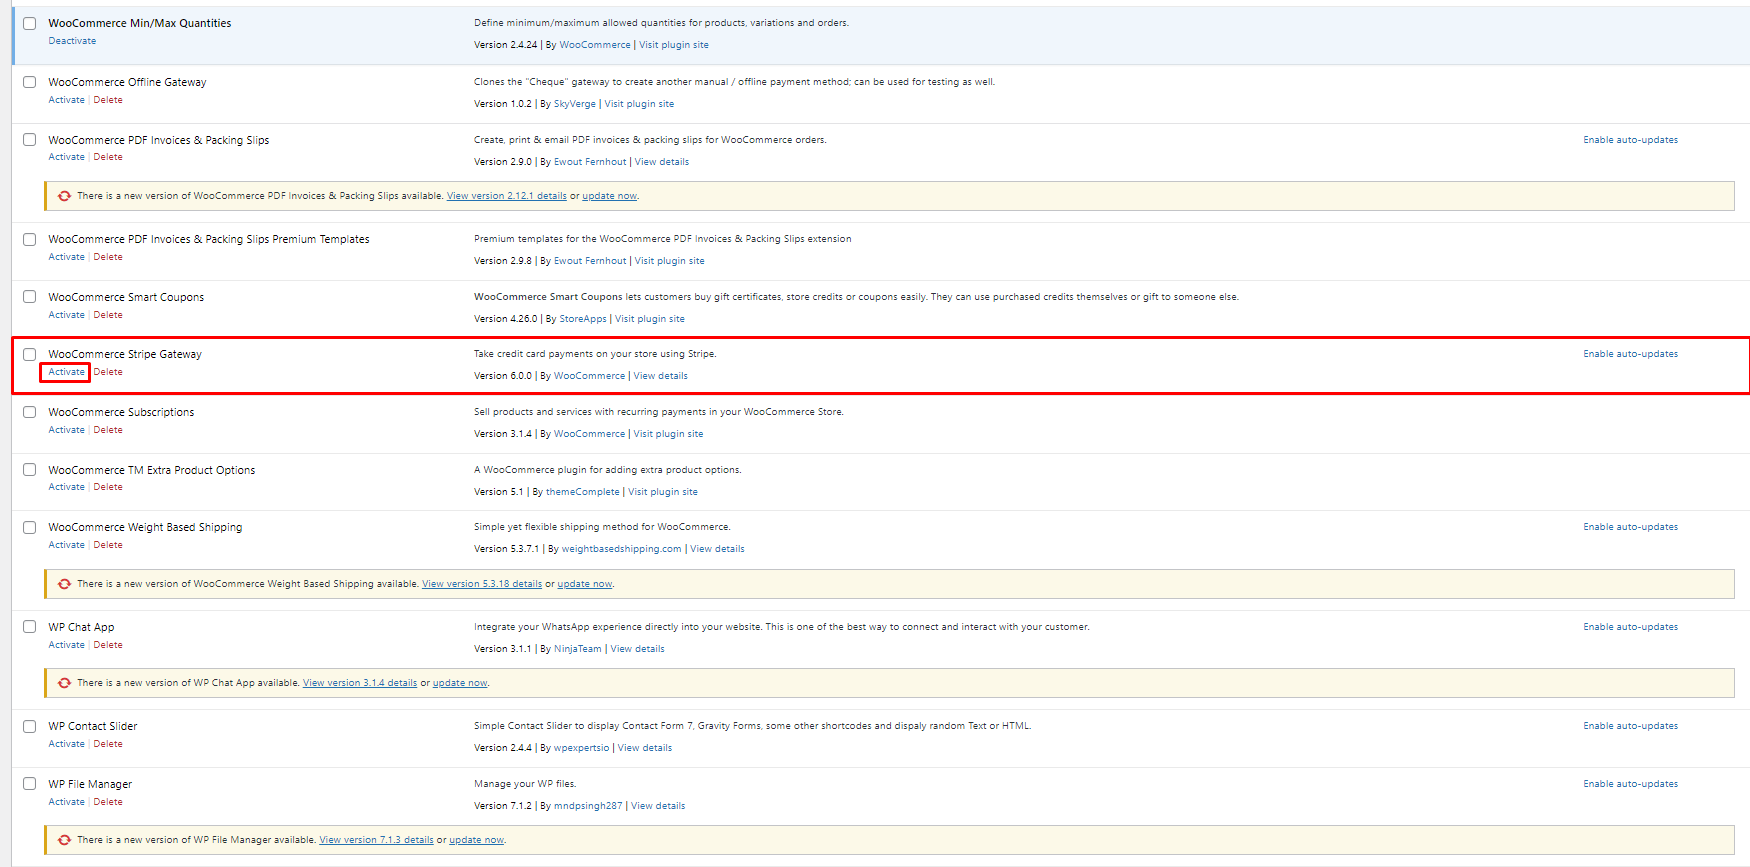
Step 2 – Activate the plugin
- Activate the plugin
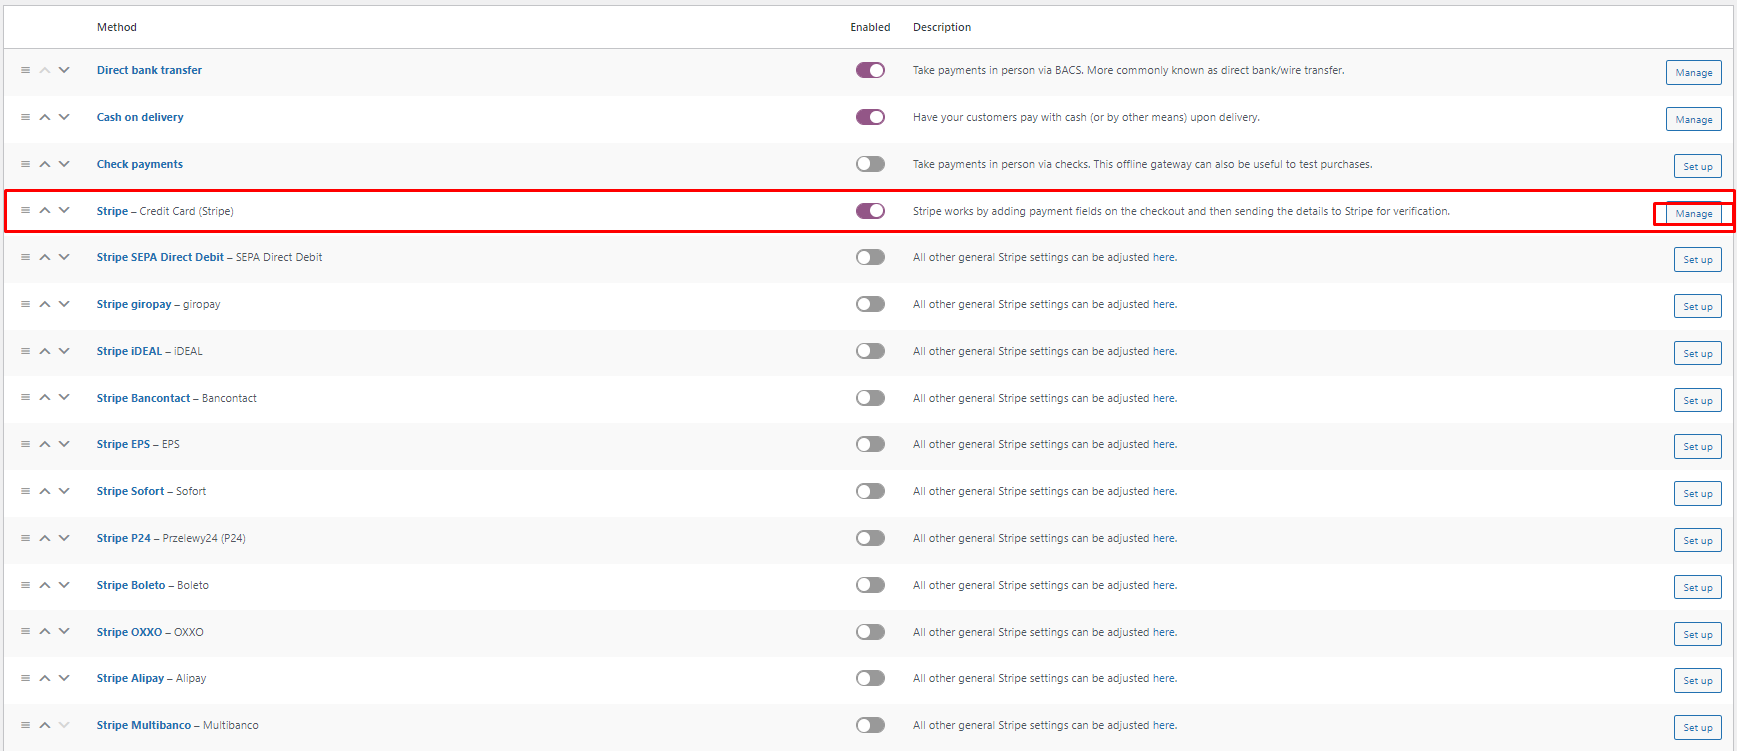
Step 3 – Configure the setting of the plugin
- (Woocommerce > Setting > Payments) and click on manage.
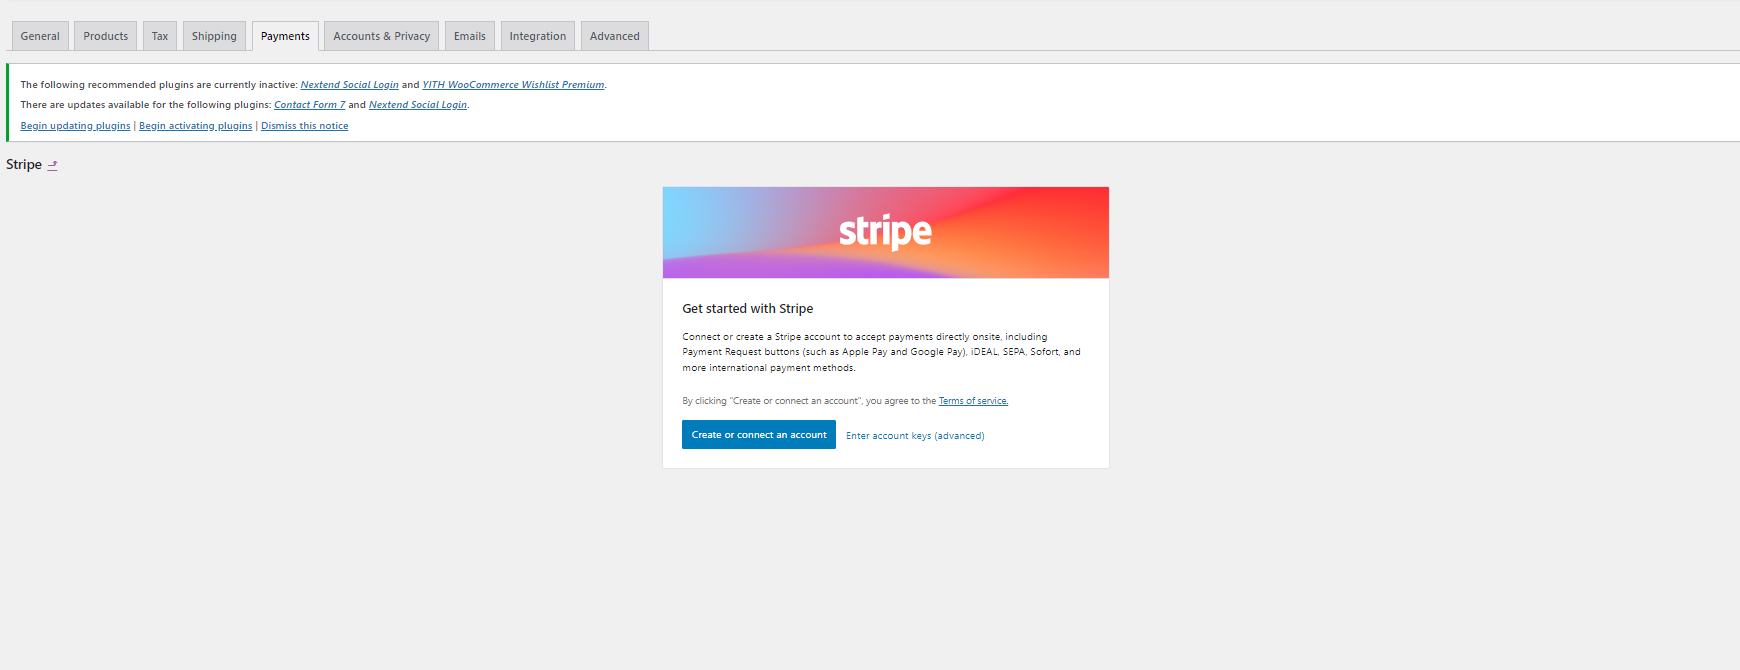
Step 4 – Choose which method to set up stripe
- There are two ways to set up stripe. One is by connecting to an account while another way to set up is just by key in the Publish key, Secret key and Webhook.
- I will go through both ways
FIRST METHOD
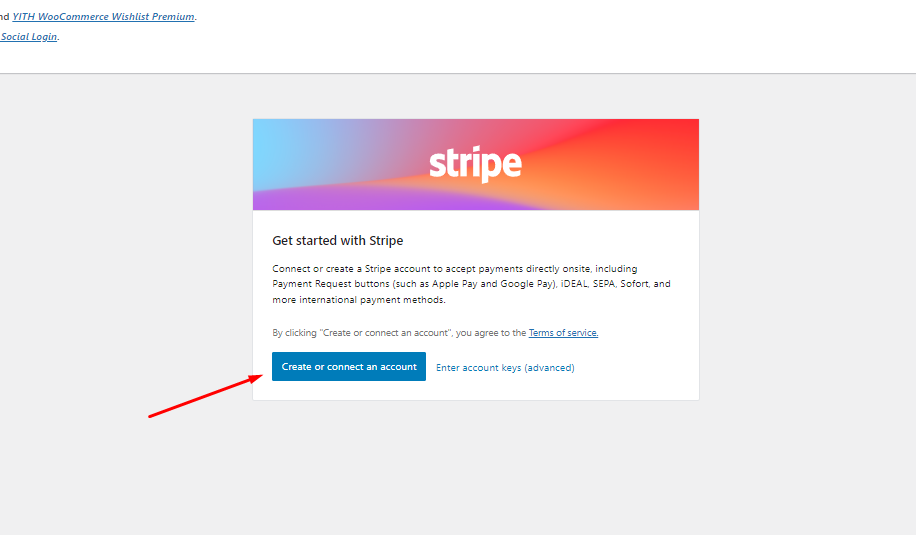
Step 5 – Create or Connect an account
- After pressing that button will redirect to stripe log in page.
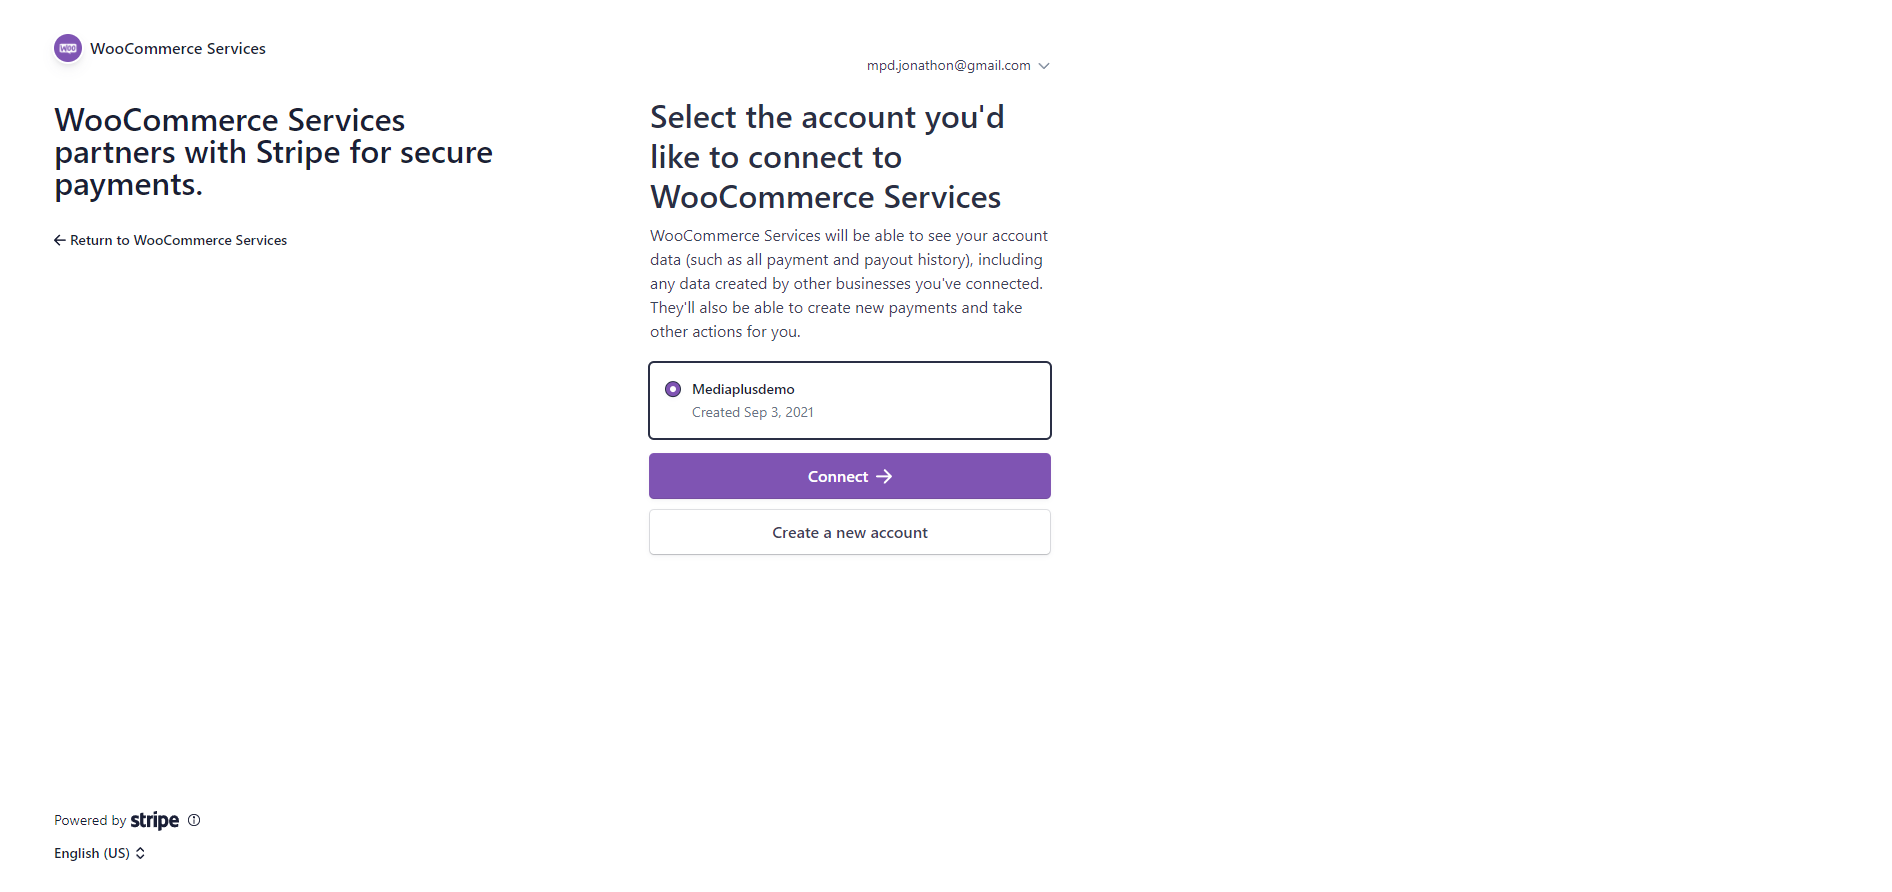
Step 6 – Log in
- By using this method. Client’s stripe account credentials must be provided to process. As you can see the picture below, i have already logged in an account.
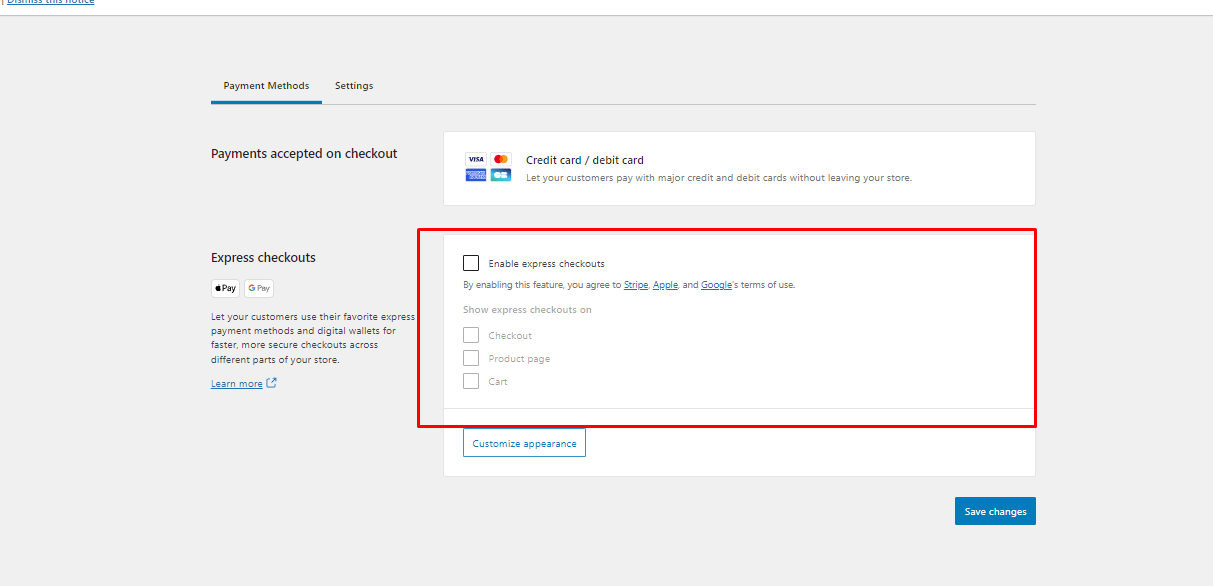
Step 7 – Disable express checkout at payment method tabs
- After logging in, disable the express checkout as google pay and apple are not often used unless special request by client.
Step 8 – Configure setting
- Enable test mode, to test the stripe payment when checking out. Please take not that this must be disabled when the site is going to go live
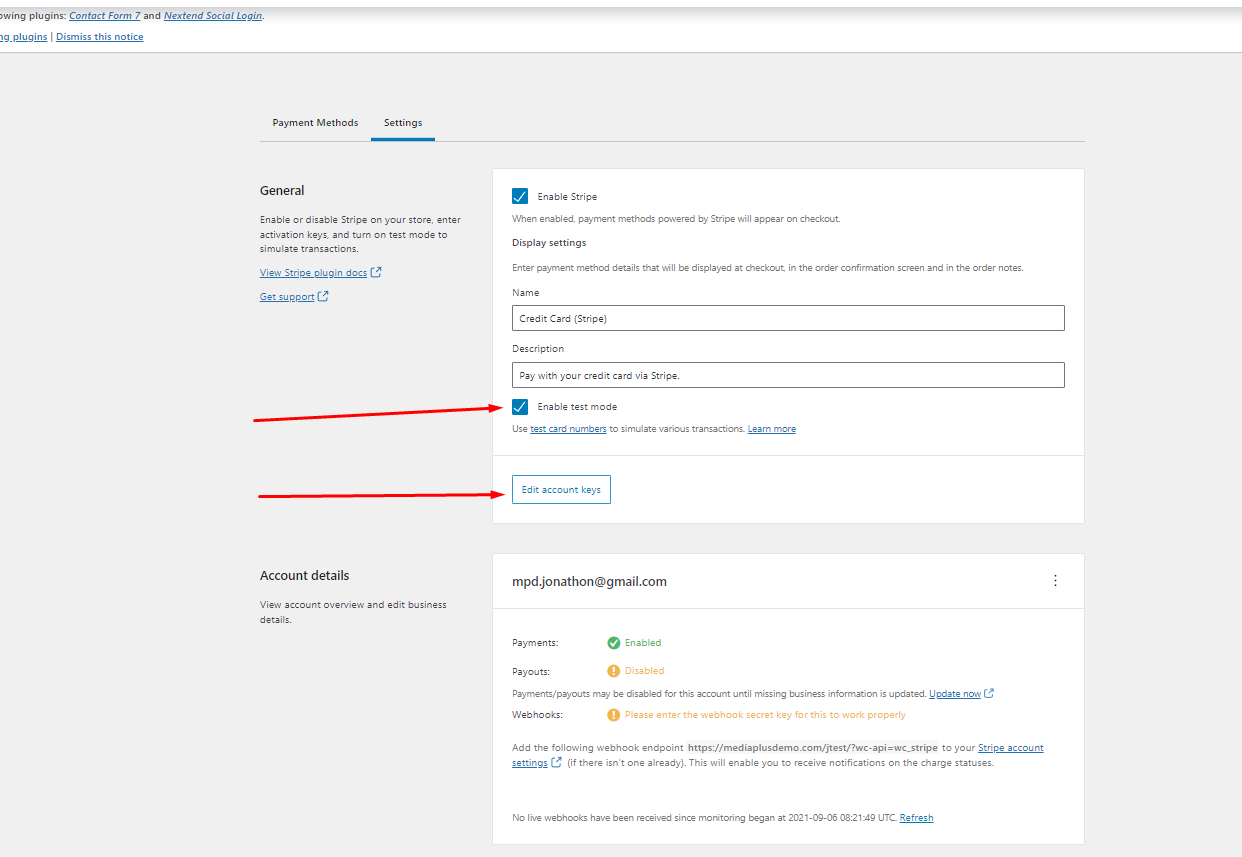
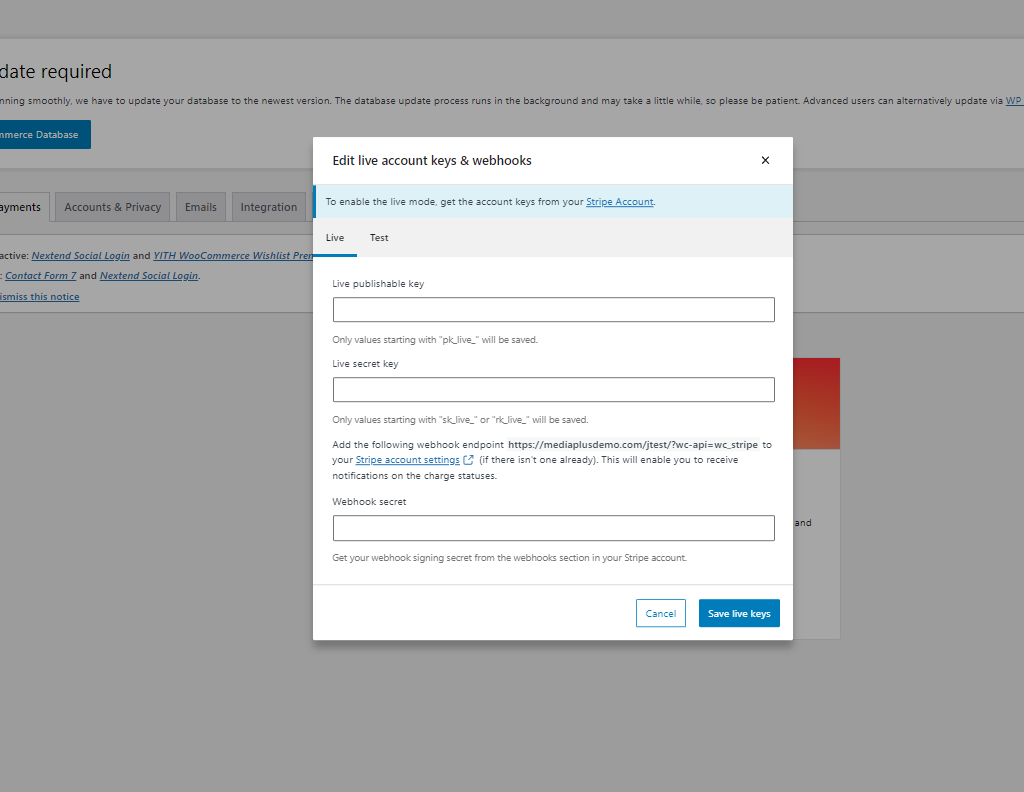
- After pressing the edit account key, above pop up image will be shown.
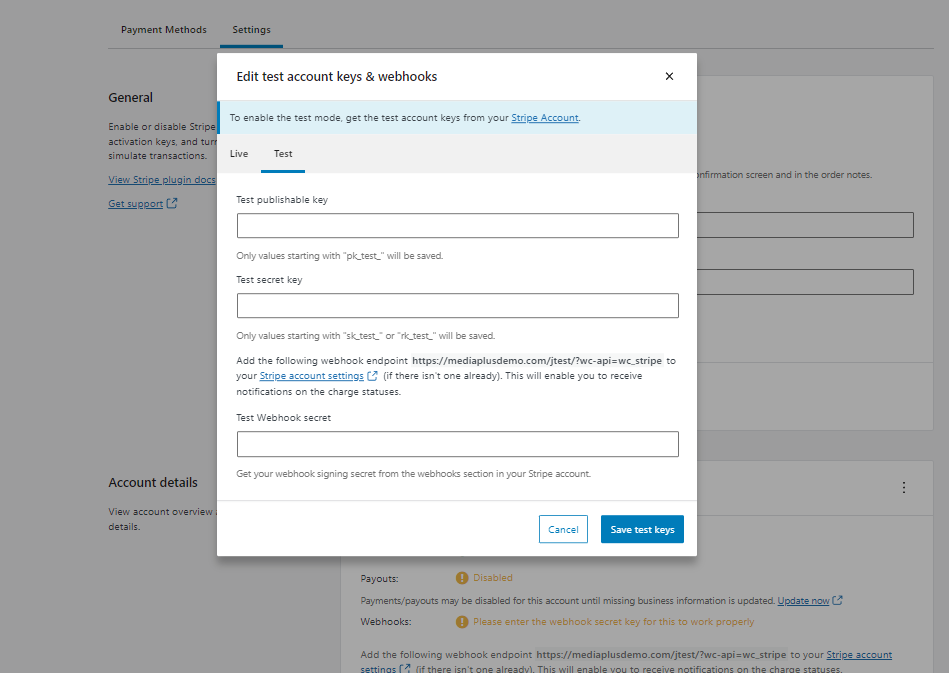
HOW TO GET TEST KEY
Step 9 – Get test keys
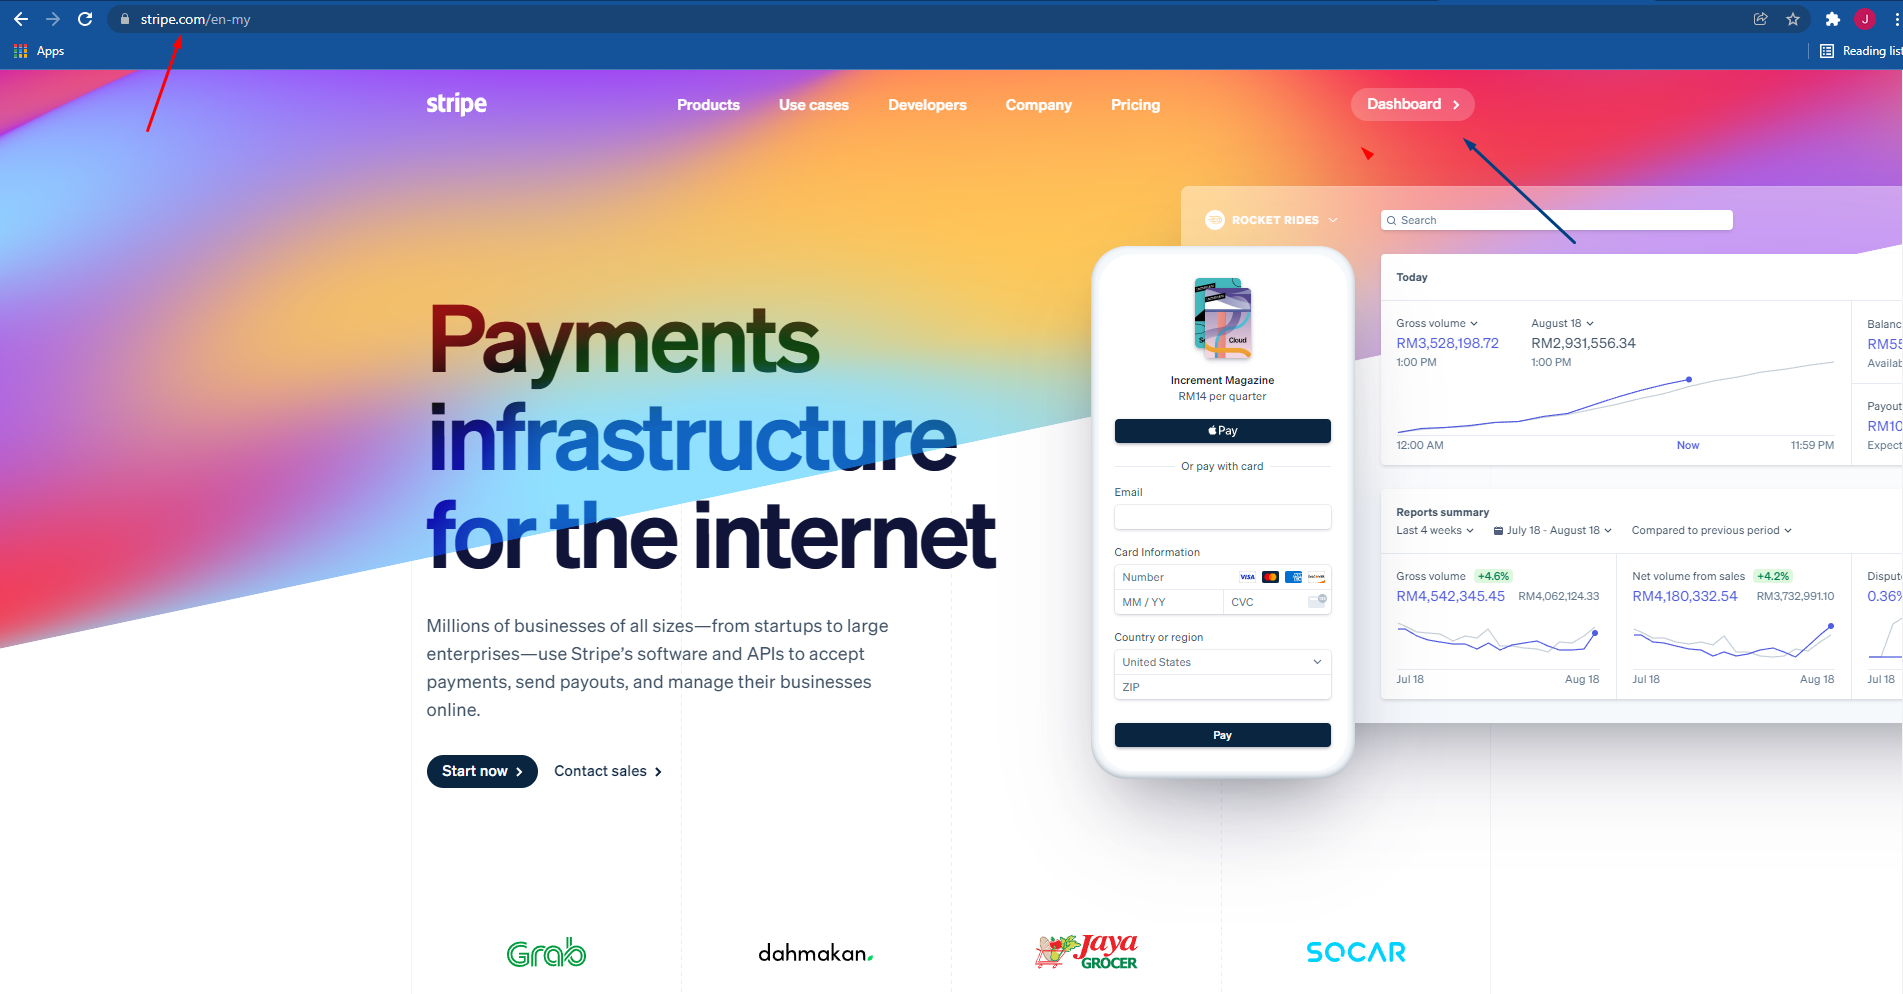
- Go to www.stripe.com, login and press dashboard
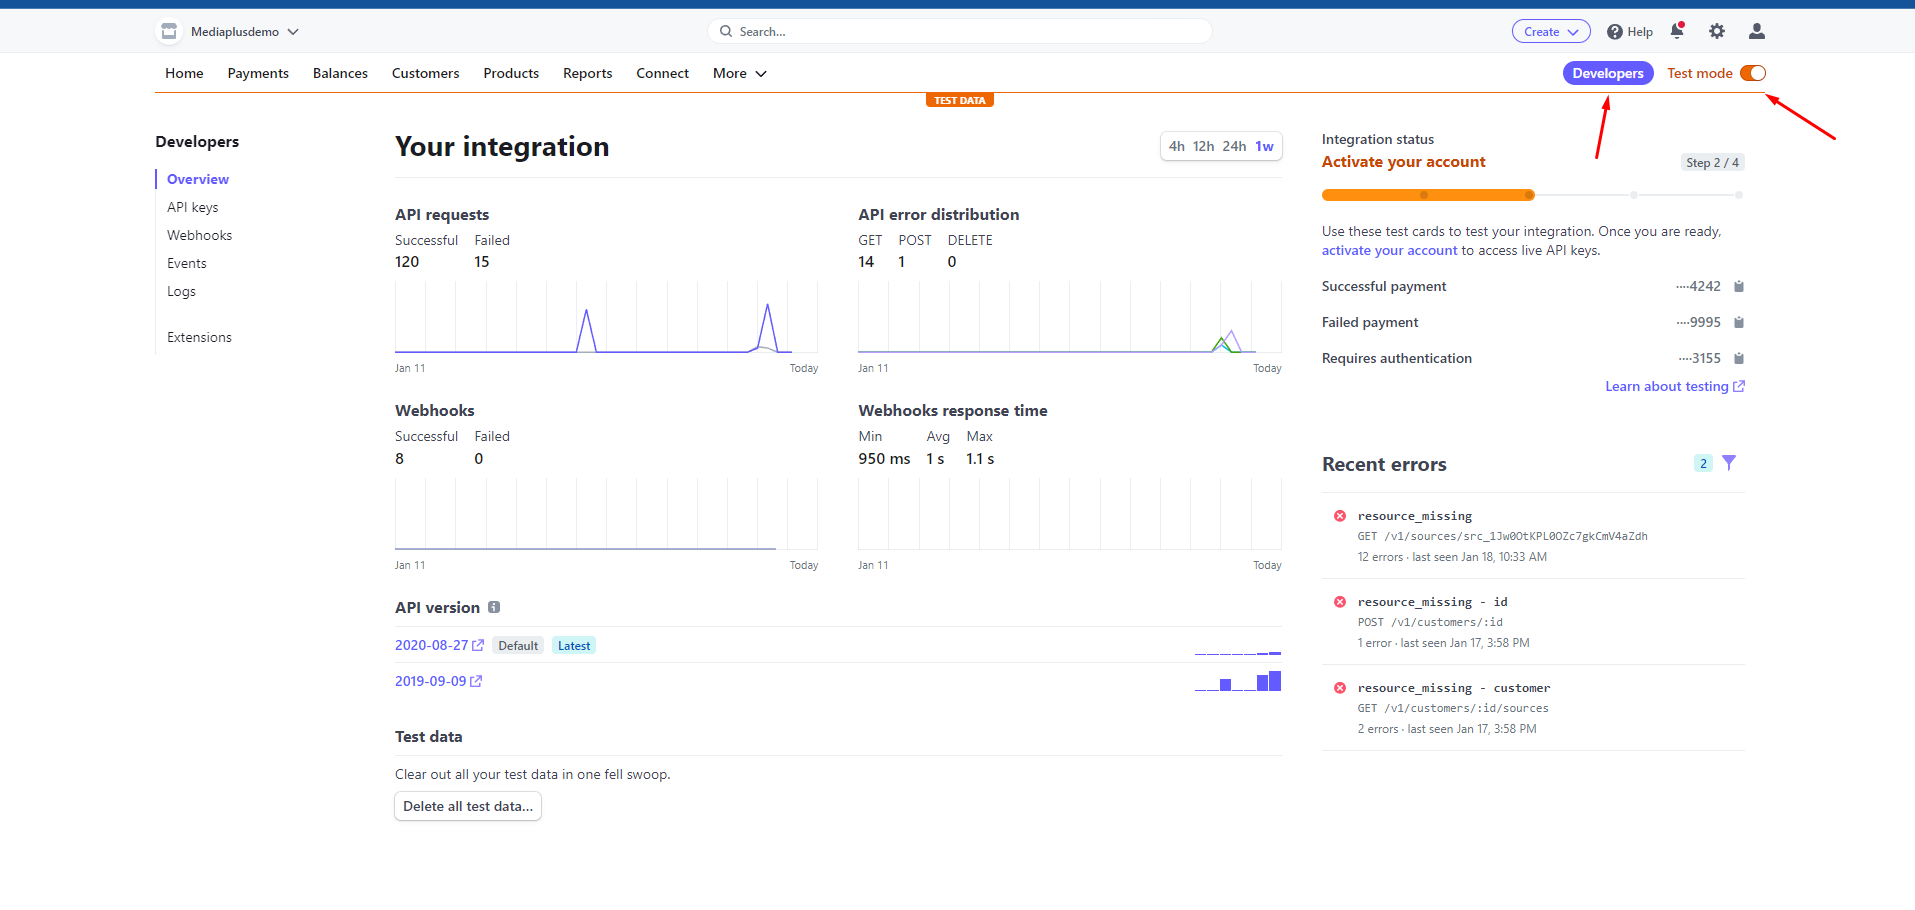
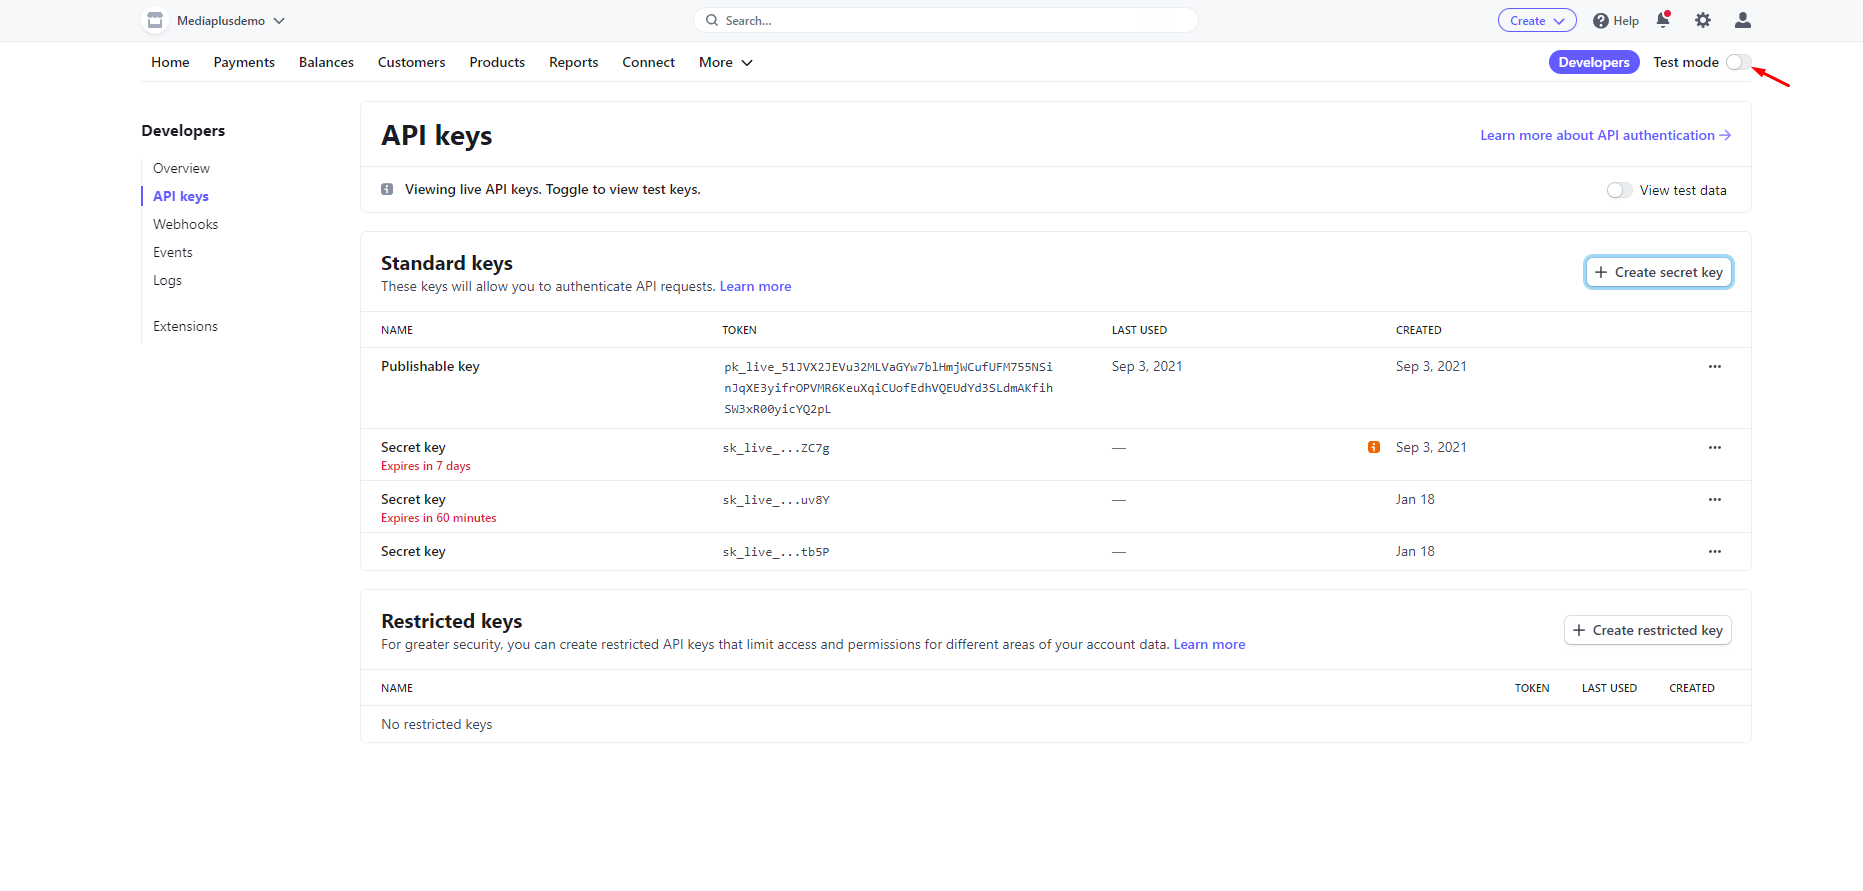
- Enable test mode and click on Developers
- To get the test keys. Press API key
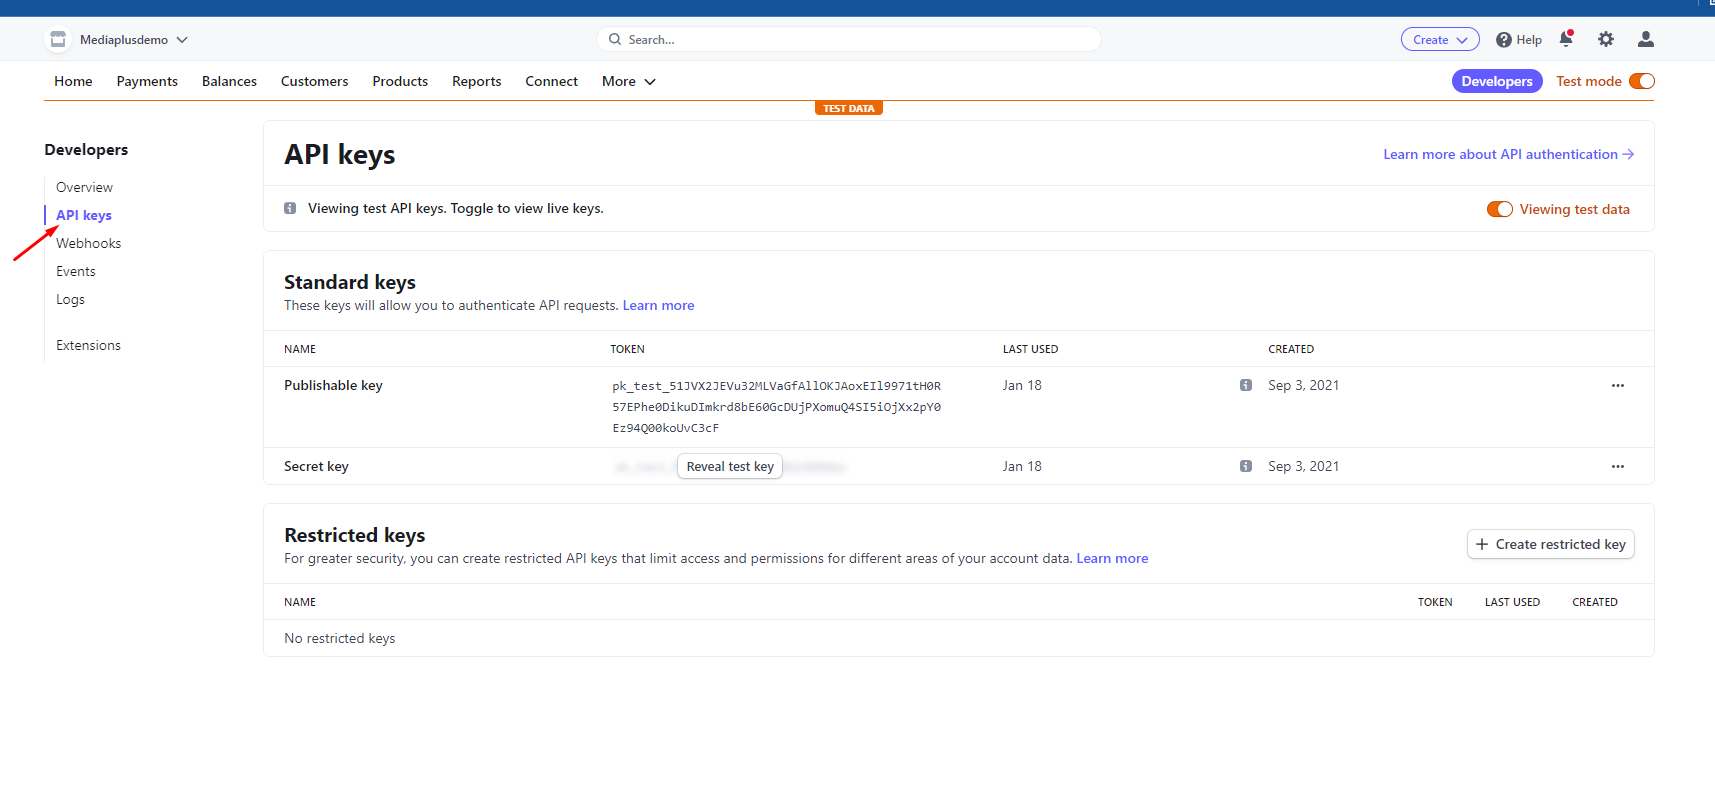
- Copy the Publishable Key and Secret Key and paste it on its respective column.
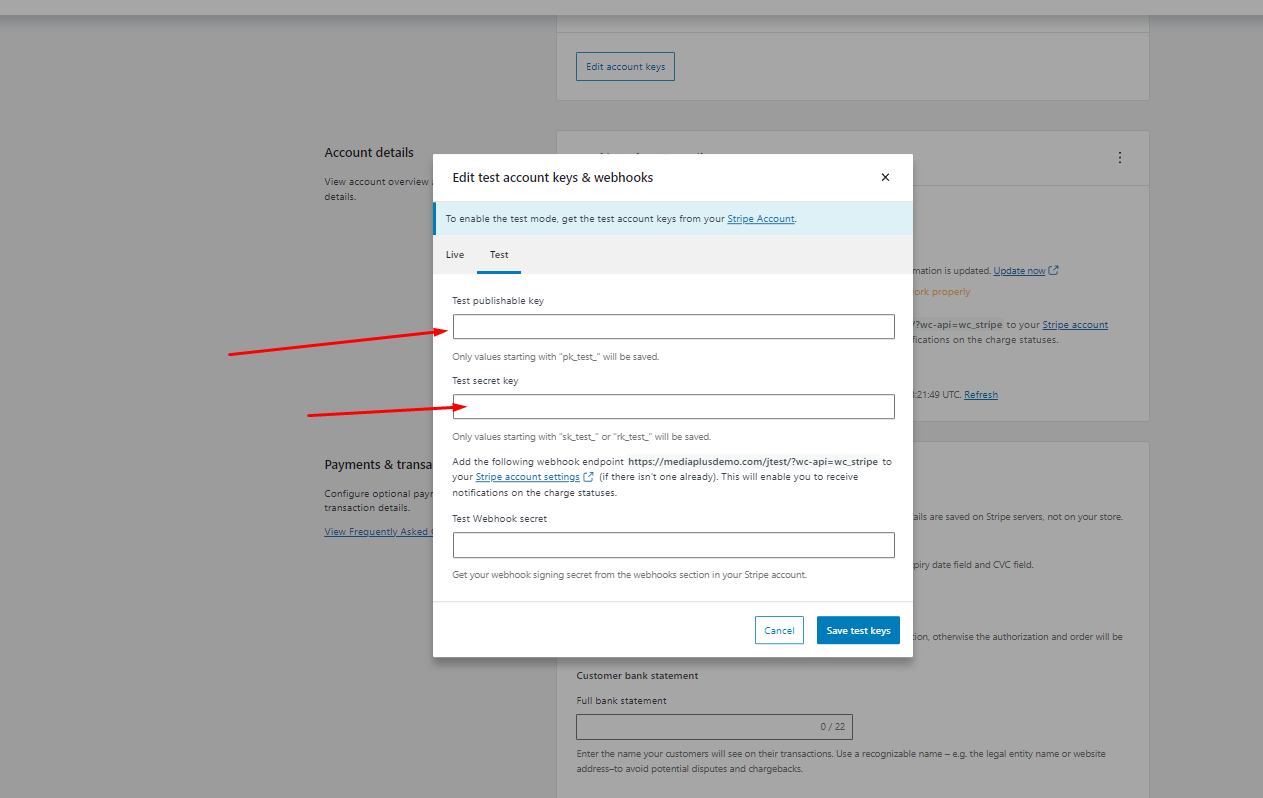
Step 10 – Setting up Webhook Secret
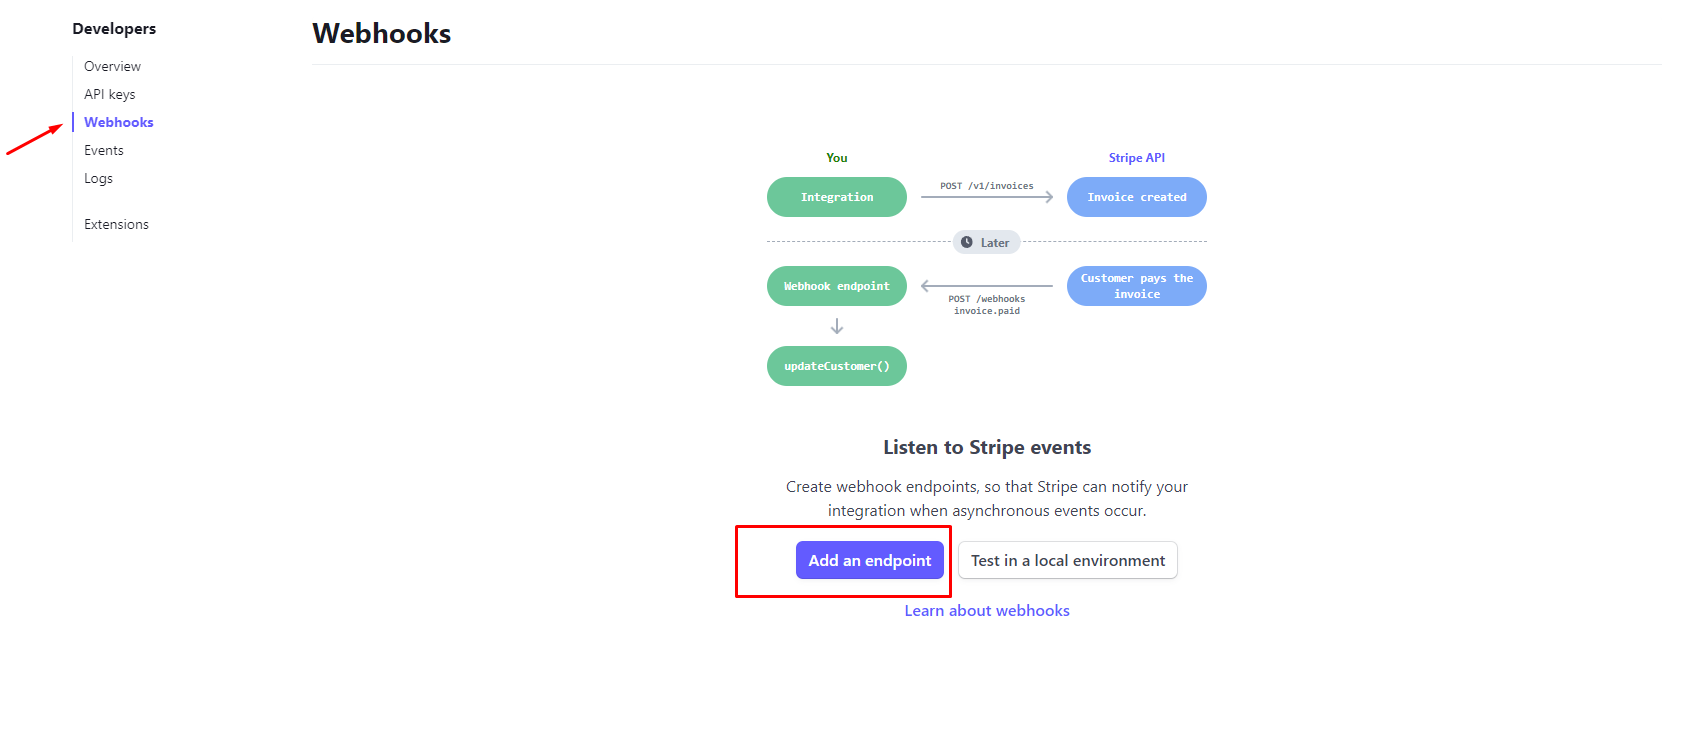
- End point URL
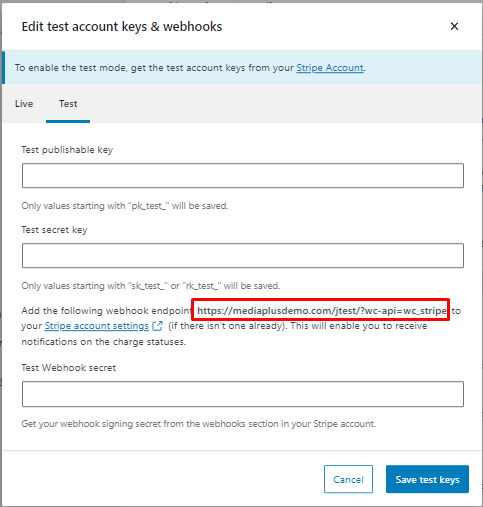
- Enter the end point url
- Tick the box for listen to events on connected account
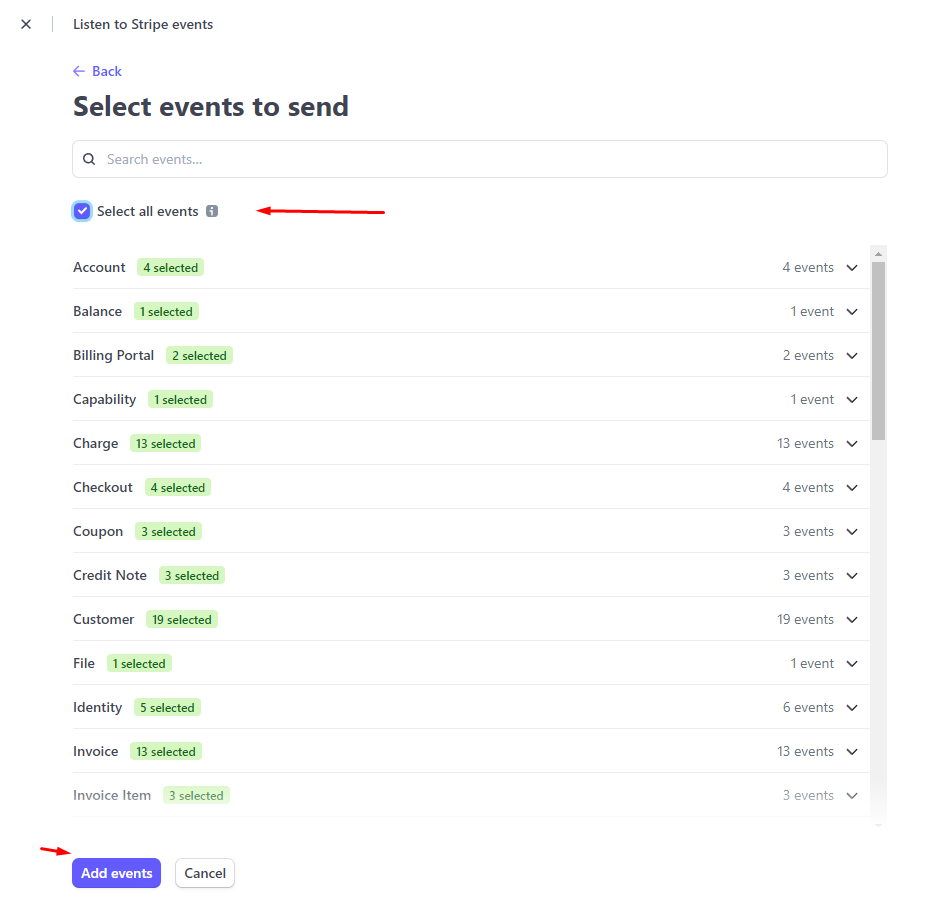
- Add events
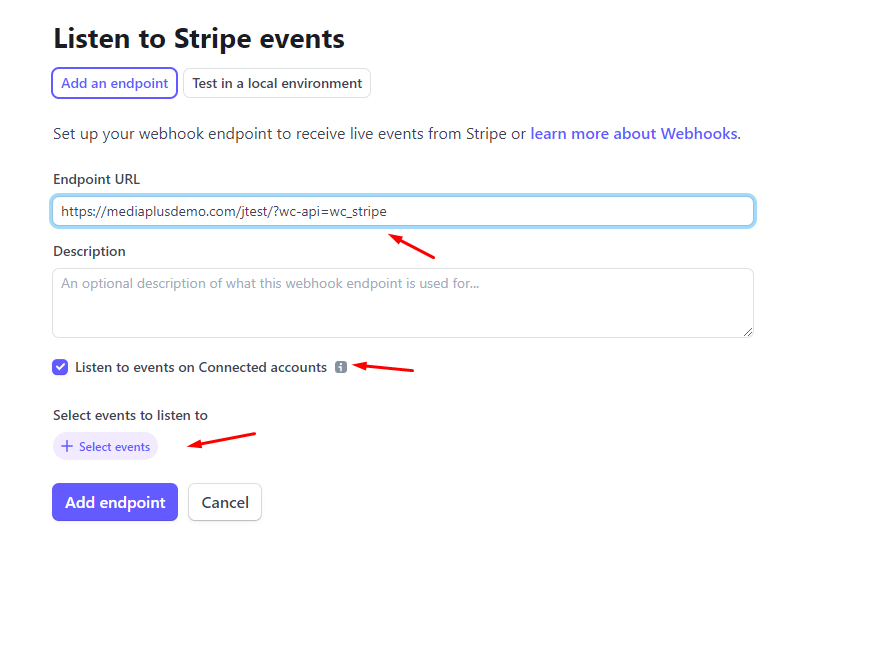
- Select all event unless special requirement are given.
- Add event and scroll down to the bottom of the page and press add end point.
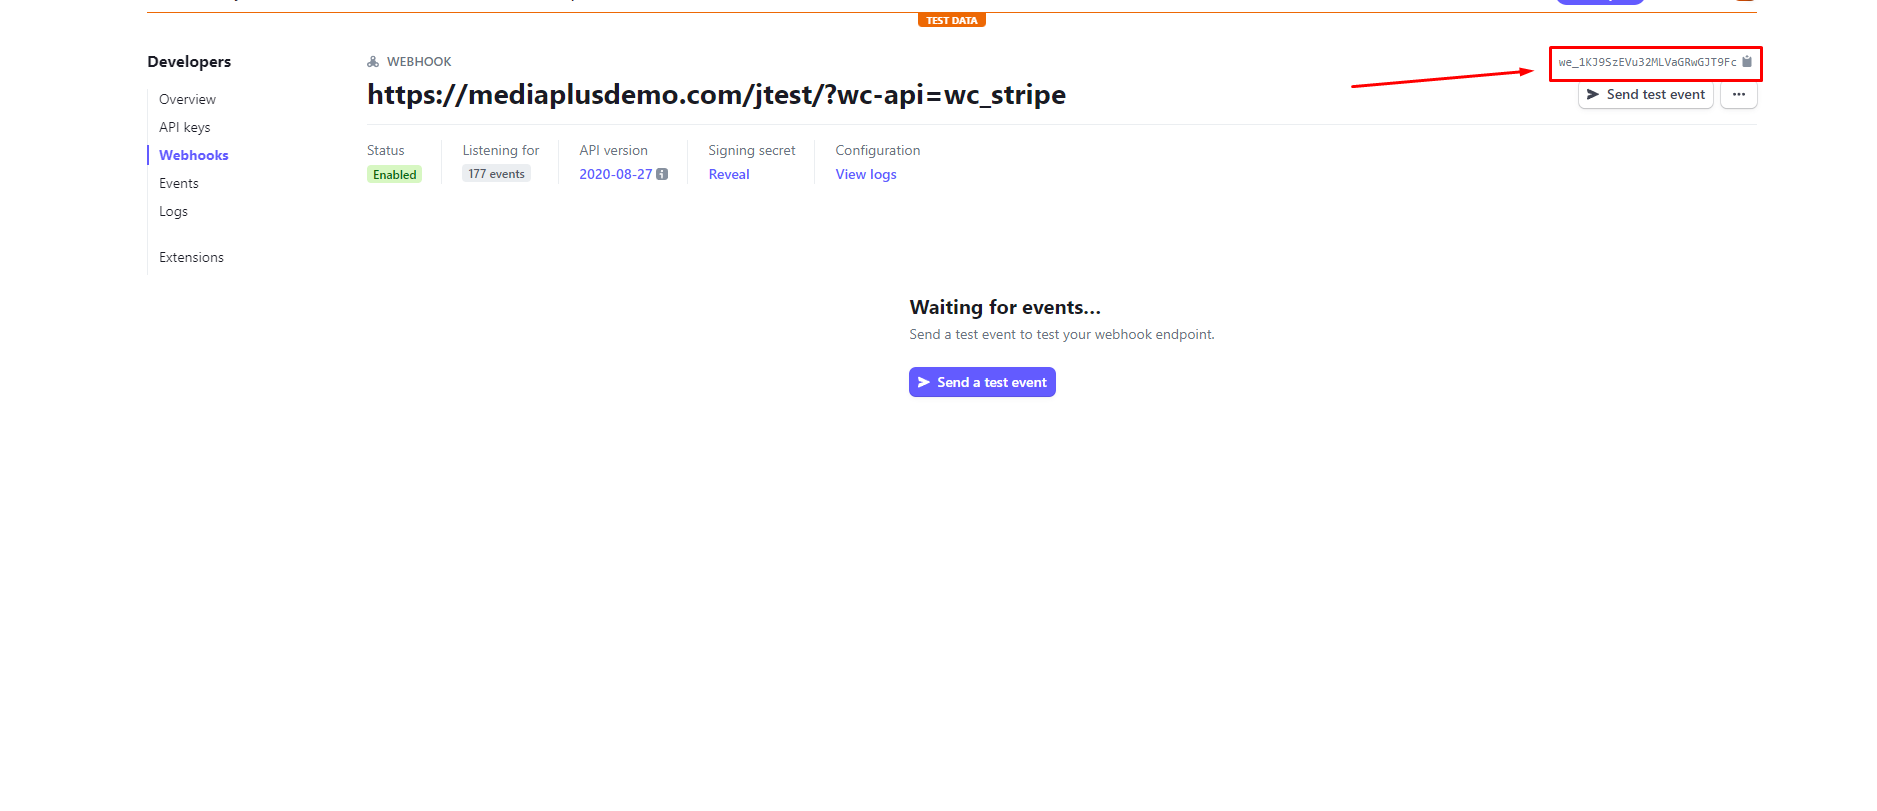
- Copy the copy shown below
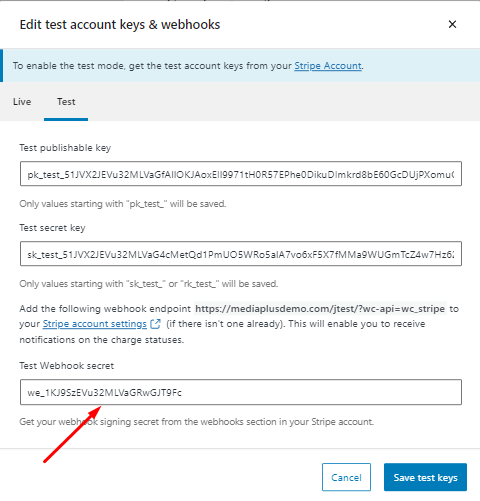
- Paste it on its respective column and press save test keys.
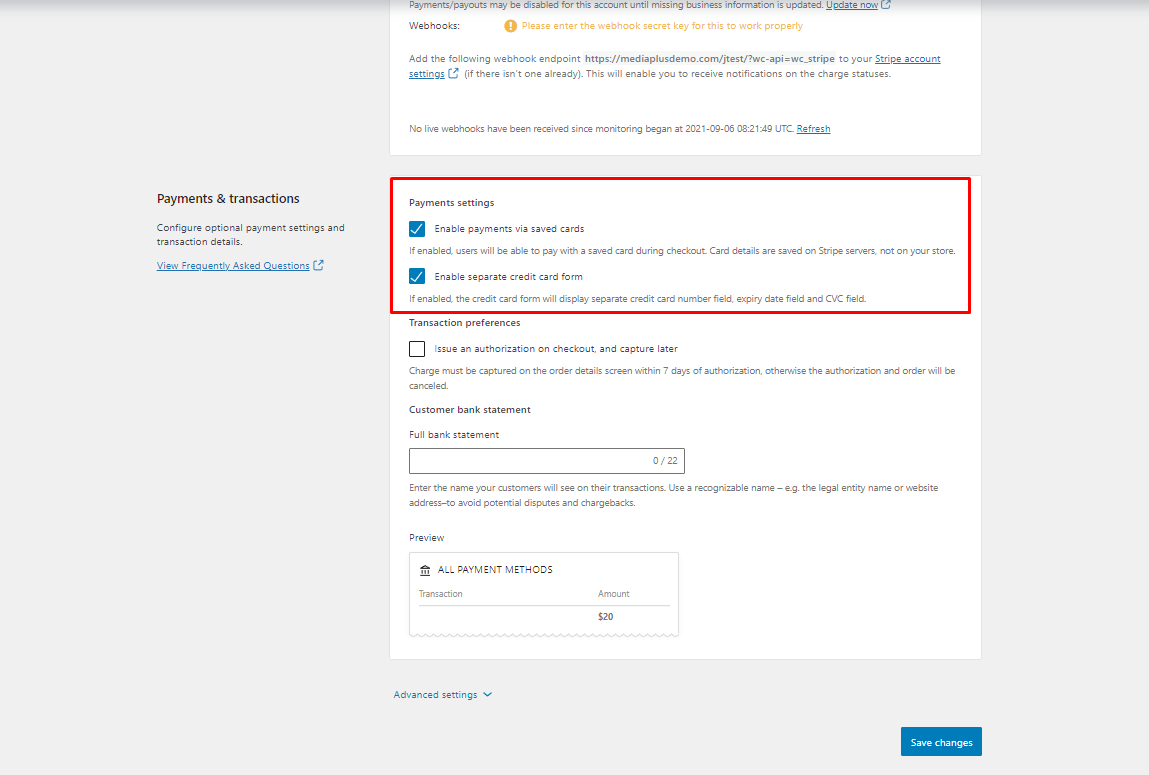
Step 11 – Enable these two setting
- This two setting is user friendly which help customer to experience smooth purchase flow when making purchase.
- Remember to click save changes after done configuring the settings.
HOW TO GET LIVE KEYS
- Go back to the stripe website and disable the test mode
- Repeat Step 9 and Step 10.
SECOND METHOD
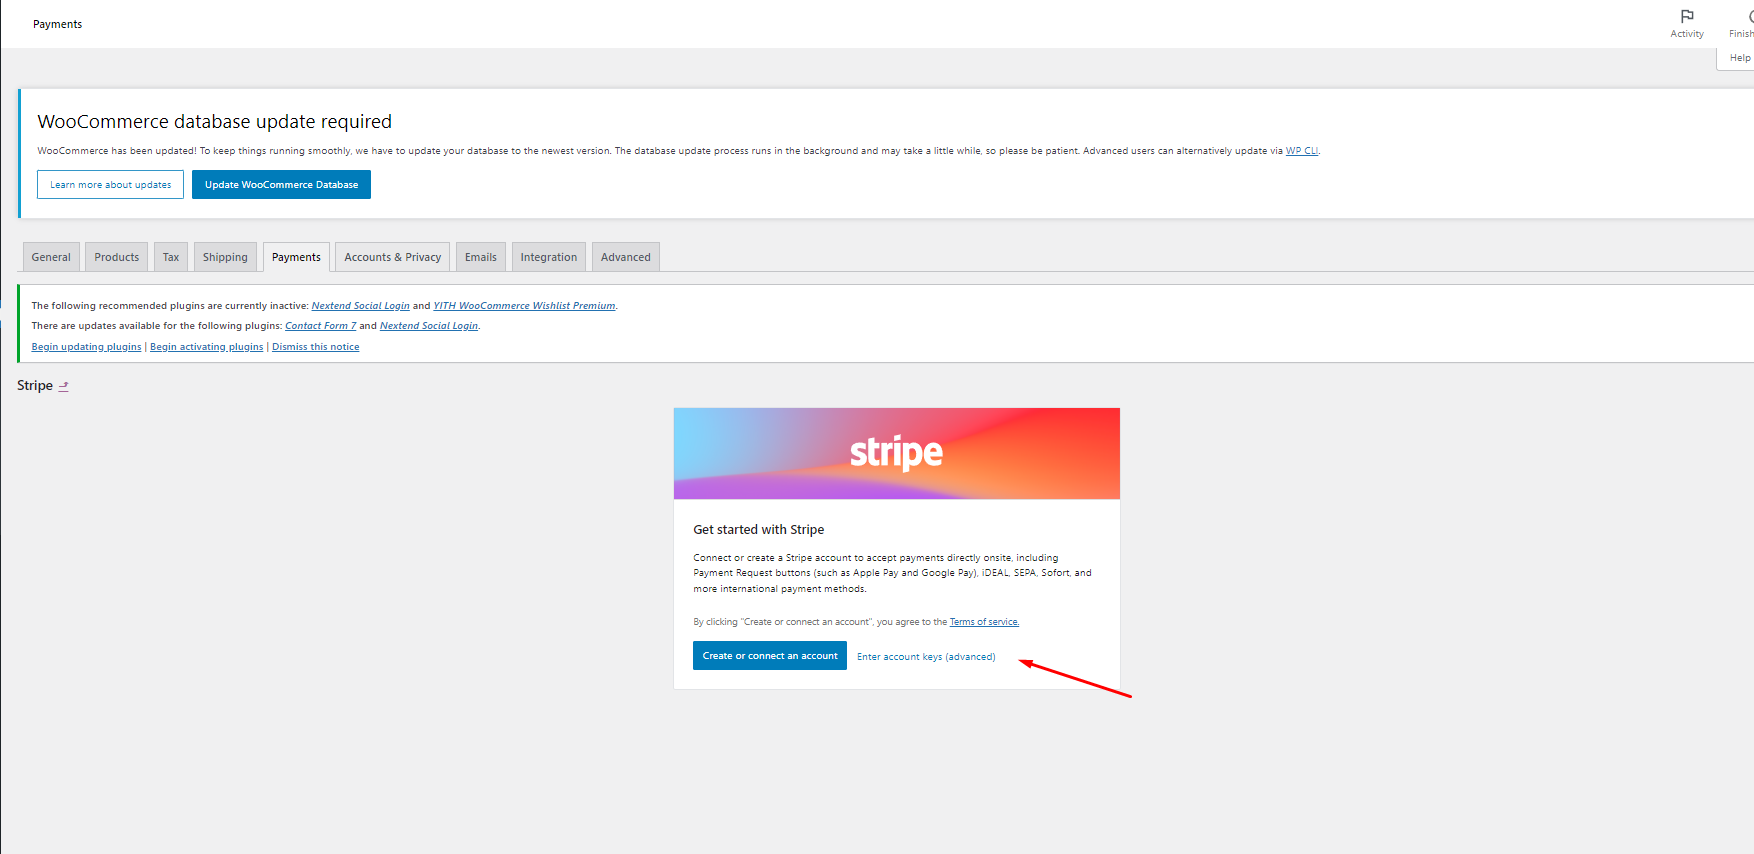
- After pressing the button, image below will pop out. Get the keys either provided by client/PM, or do the same thing by logging into stripe at www.stripe.com and get the keys and paste it inside.
- After saving the keys then all are good to go!
To make life easier for yall. I have uploaded a guide video on google drive.