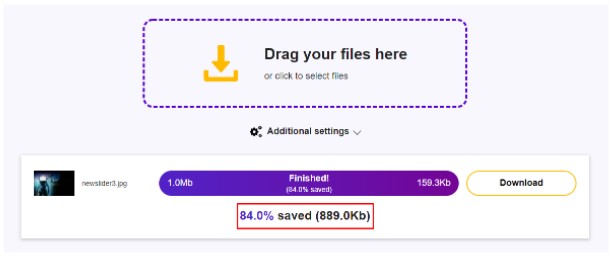
Optimizing images on the website is very necessary:
– Website to load faster
– Save storage space
– SEO friendly
– Website with high scores on website evaluation tools
We often have images for Logo, Slider, Banner, Site Icon, Post Image, Product Image,… with different image formats such as Jpeg, Png, Svg, Gif… and important things before Uploading them to the website is to optimize them.
So what is image optimization? Image optimization is:
– Use the correct image format needed
– Use the correct image size needed
– Compress images to reduce image size without changing the quality of the image.
I. Use the correct image format needed
-
Jpeg
– You should use a JPEG when…
You’re dealing with online photos and/or artwork. JPEGs offer you the most flexibility with raster editing and compression making them ideal for web images that need to be downloaded quickly.
You want to print photos and/or artwork. At high resolution files with low compression, JPEGs are perfect for editing and then printing.
You need to send a quick preview image to a client. JPEG images can be reduced to very small sizes making them great for emailing.
– Don’t use a JPEG when…
You need a web graphic with transparency. JPEGs do not have a transparency channel and must have a solid color background. GIF and PNG are your best options for transparency.
You need a layered, editable image. JPEGs are a flat image format meaning that all edits are saved into one image layer and cannot be undone. Consider a PSD (Photoshop) file for a fully editable image.
-
Gif
– You should use a GIF when…
You want to create web animation. GIF images hold all of the animation frames and timing information in one single file. Image editors like Photoshop make it easy to create a short animation and export it as a GIF.
You need transparency. GIF images have an “alpha channel” that can be transparent, so you can place your image on any colored background.
You need a small file. The compression techniques in the GIF format allow image files to shrink tremendously. For very simple icons and web graphics, GIF is the best image file format.
– Don’t use a GIF when…
You need a photographic-quality image. Though GIFs can be high resolution, they have a limit of 256 colors (unless you know a few tricks). Photos typically have thousands of colors and will look flat and less vibrant (and sometimes weird due to color banding) when converted to GIF.
You need to print an image. Because of the color limit, most printed photos will lack depth. If you need to print photos, look at TIFF, PSD and JPG.
You need a layered, editable image. GIFs are a flat image format meaning that all edits are saved into one image layer and cannot be undone. Consider a PSD (Photoshop) file for a fully editable image.
-
Png
– You should use a PNG when…
You need high-quality transparent web graphics. PNG images have a variable “alpha channel” that can have any degree of transparency (in contrast with GIFs that only have on/off transparency). Plus, with greater color depths, you’ll have a more vibrant image than you would with a GIF.
You have illustrations with limited colors. Though any image will work, PNG files are best with a small color palette.
You need a small file. PNG files can shrink to incredibly tiny sizes—especially images that are simple colors, shapes or text. This makes it the ideal image file type for web graphics.
– Don’t use a PNG when…
You’re working with photos or artwork. Thanks to PNGs’ high color depth, the format can easily handle high resolution photos. However, because it is a lossless web format, file sizes tend to get very large. If you’re working with photos on the web, go with JPEG.
You’re dealing with a print project. PNG graphics are optimized for the screen. You can definitely print a PNG, but you’d be better off with a JPEG (lossy) or TIFF file.
-
SVG
– You should use a SVG when…
You want to create computer generated graphs and diagrams for publishing on the web.
– Don’t use SVG when…
You need a file format for a print workflow.
There are many documents that talk very clearly and in detail on how to choose an image format, see more:
https://www.designpowers.com/blog/image-file-formats
https://99designs.com/blog/ tips/image-file-types
https://web.dev/choose-the-right-image-format/
II. Use the correct image size needed
This is very simple, we just need to measure the width and height of the layout that needs to display the image, for example a banner with a layout size of 300 x 400 (px), then we need to use an image editing tool like Paint , Photoshop to crop the image with the same size 300 x 400 (px).
For Product Image and Post Image
The product image size should be cropped based on the product image display layout on the product detail page (this is the same for the article image). For example, the layout displays a detailed product image of 450 x 450, the product image will also be cropped to this size.
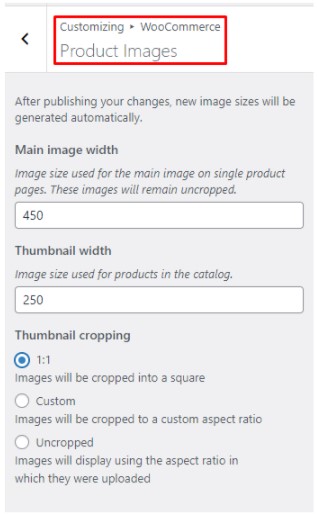
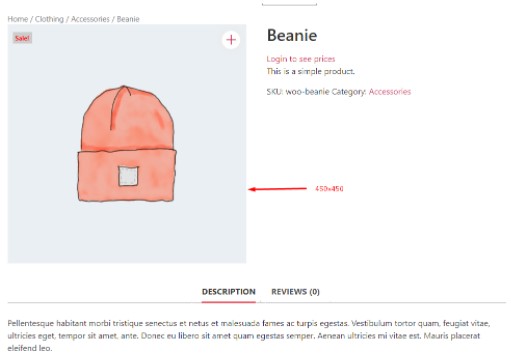 Don’t worry that this image size will be large when displayed on the shop page, catalog page because WooComemrce has a suitable image cropping mechanism to display for these layouts. The scale of the product image will determine the choice of how to crop the image.
 For article images, image size adjustment is done at Settings / media
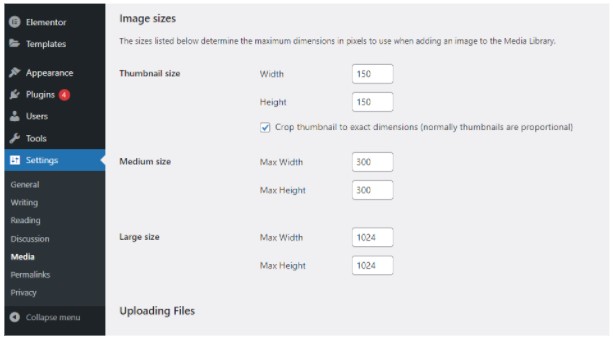
Please note, this image resizing does not apply to images uploaded to Media. We will need to use the Regenerate Thumbnails plugin to re-run the images already on Media
III. Compress images
Currently there are many plugins that allow image compression from uploading images to Media such as:
Smush – Lazy Load Images, Optimize & Compress Images
EWWW Image Optimizer
ShortPixel Image Optimizer
ReSmush.it
WP-Optimize – Cache, Clean, Compress.
But the best and most effective way is to compress images with tools. These are some of the commonly used online tools that give good image quality with high compression.
https://www.websiteplanet.com/webtools/imagecompressor/