
WordPress version 4.x.x and above
wordpress version 4.x.x and below
WordPress version 4.x.x and above
WOOCOMMERCE INTEGRATION SETUP
1.1 Steps To Setup WooCommerce Integration
Follow the steps below to setup the WooCommerce Integeration
1.1.1 Step 1: Generating API Keys
1. In WooCommerce > Settings > Advanced > REST API > Add Key
2. Add a Description, and choose “Read/Write” as the level of access for the API key. Then click Generate API Key button.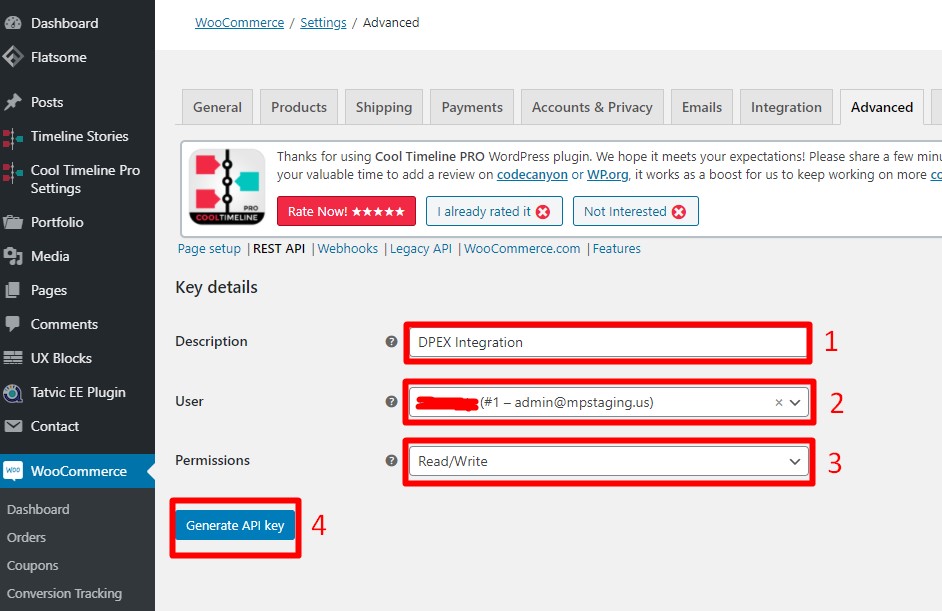
3. The consumer key and consumer secret will be need in Step 2: Setting up WooCommerce Integration in GETOnline. Copy the API keys and save it somewhere as we will not able to view the full keys again once we exit from this page.
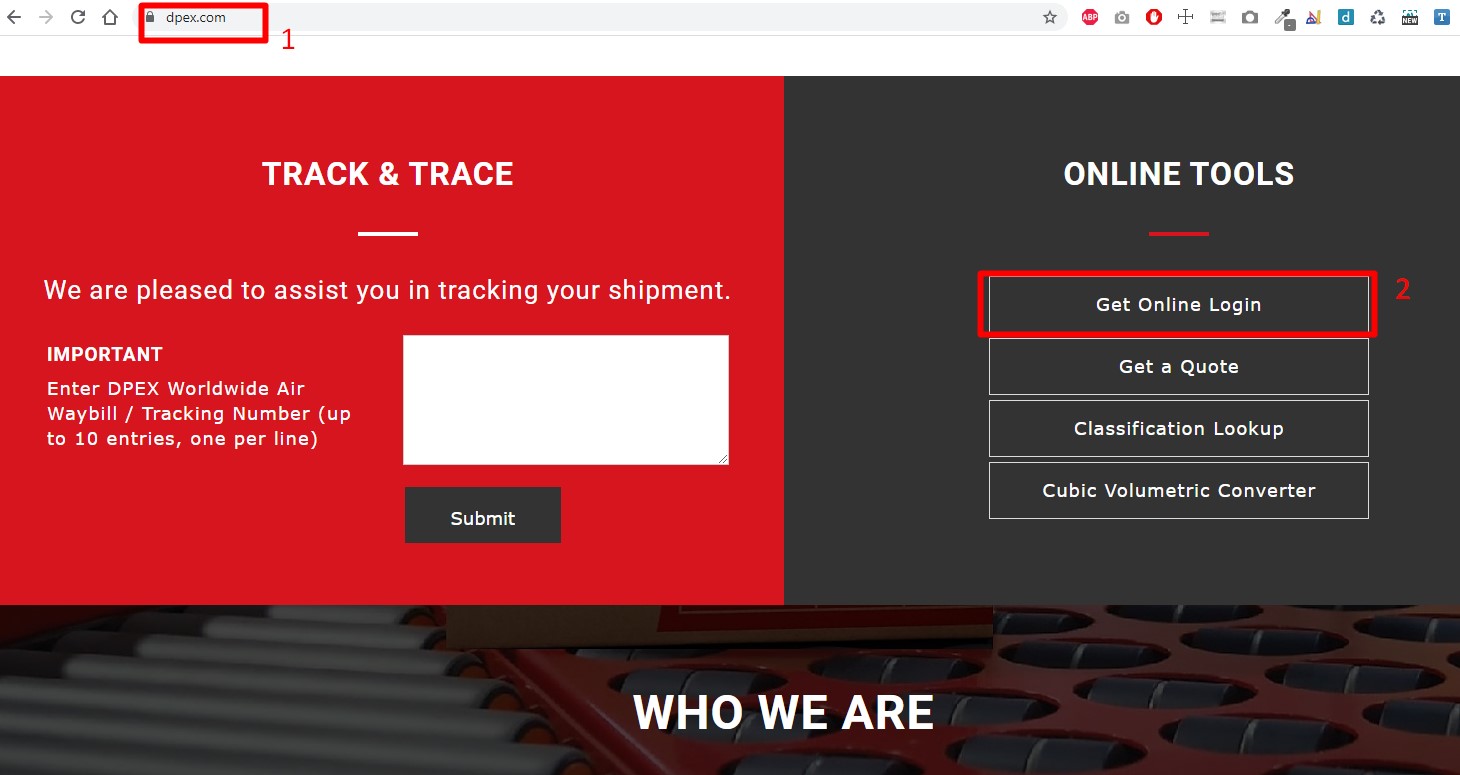
1.1.2 Step 2: Setting up WooCommerce Integration in GETOnline
- Go to https://dpex.com/ and scroll down until you reach the login button
2. Then you will be directed to this page. Fill in the username > password > Click “Login Now”.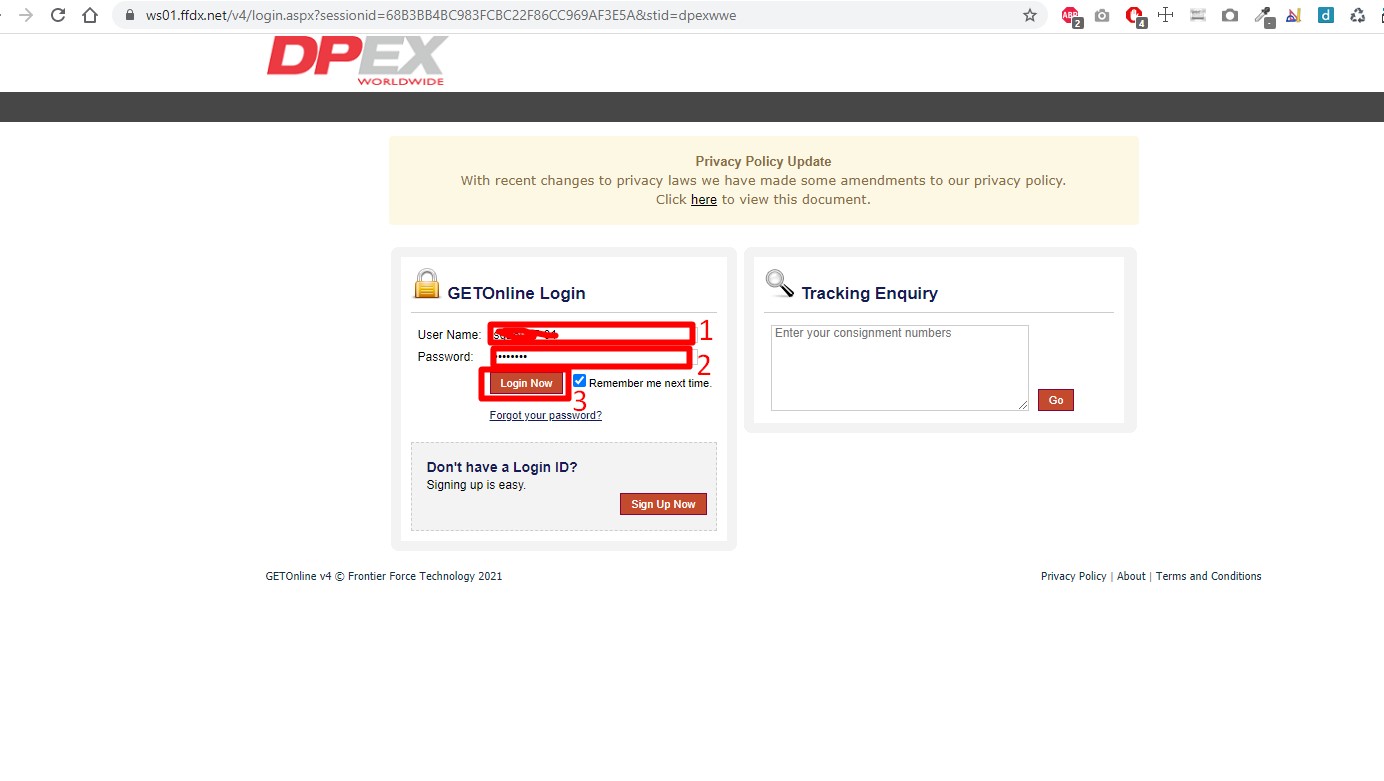 3. Once the page is loaded, click on “Set Up Your e-Commerce Integrations” button.
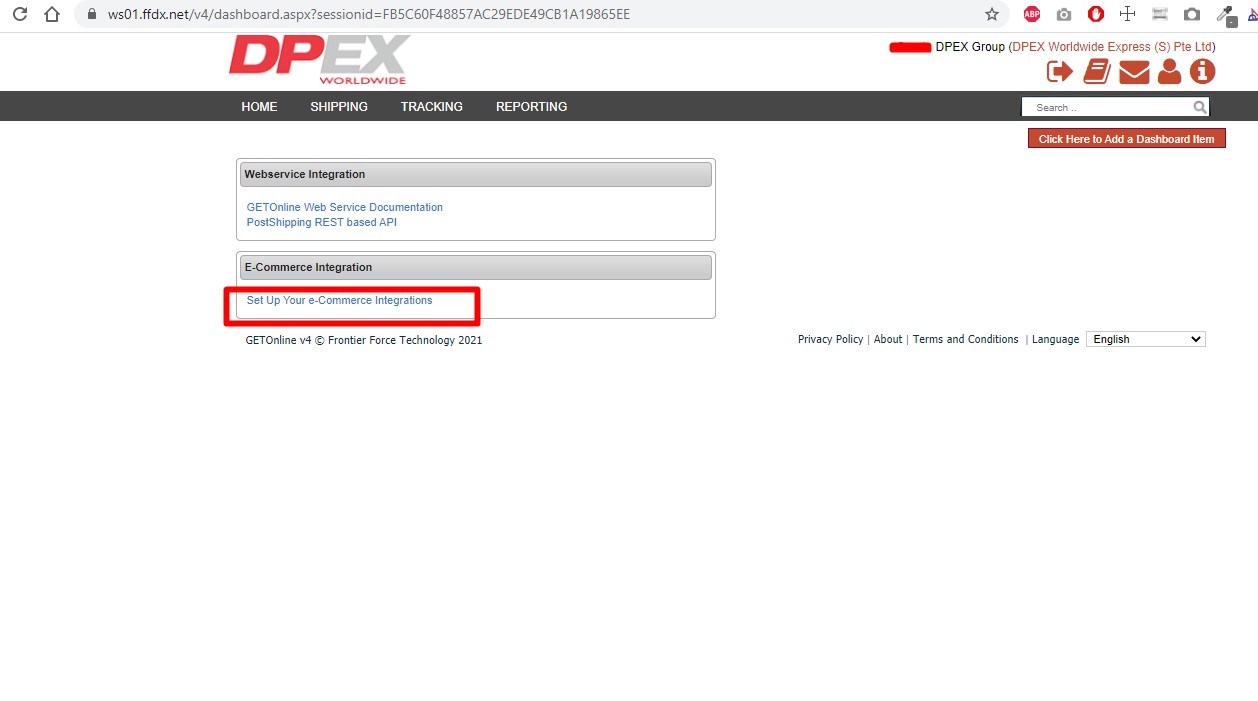
4. Then go the WooCommerce section and click the “View” button
5. Click “Add New Account”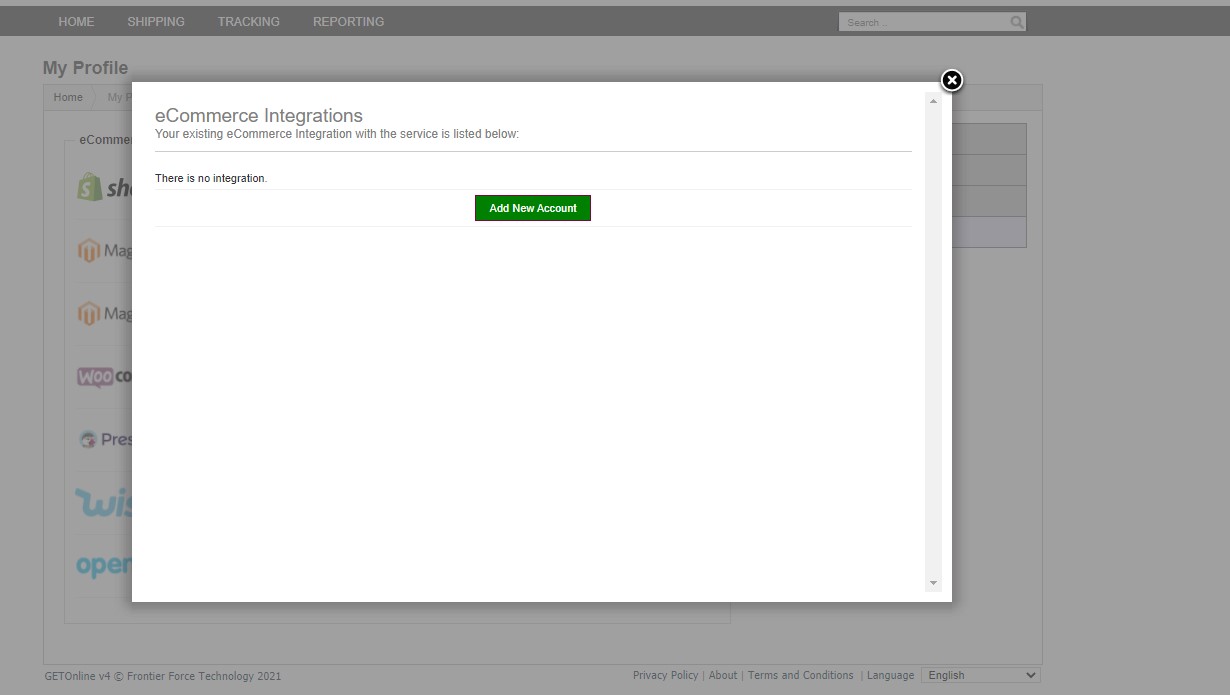
6. Fill in the details and click “Save Changes” button:
-Store URL : Full URL to the WooCommerce store, without end with “/”
-Consumer Key: consumer key where you generated in Step 1
-Consumer Secret: consumer secret where you generated in Step 1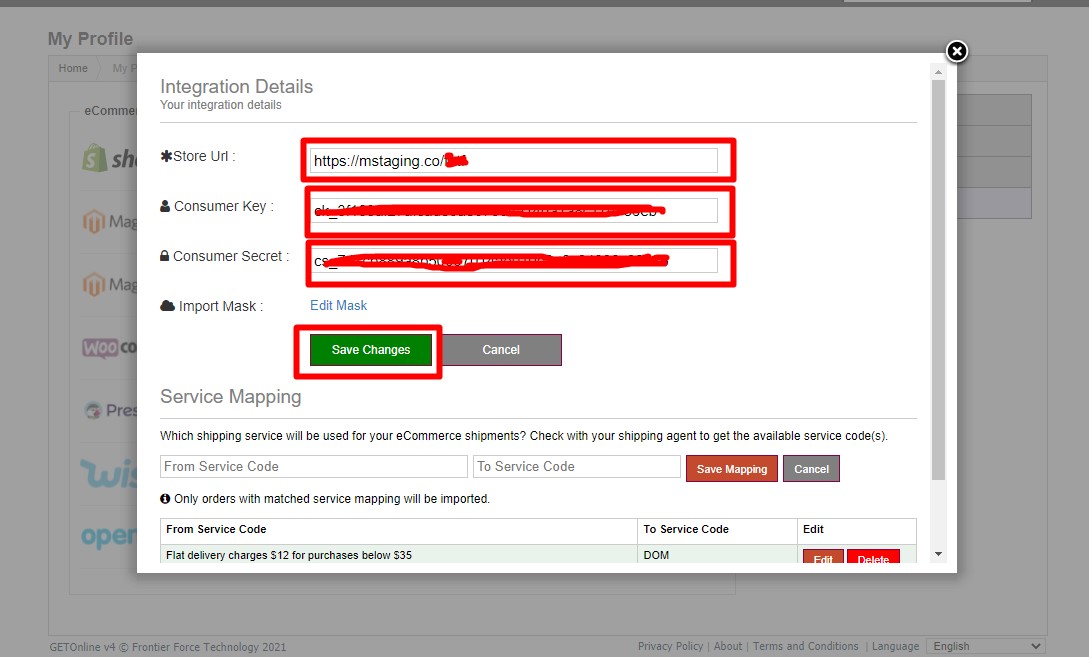
1.1.3 Step 3: Manage Service Mapping
Service mapping is managed per integration setup. User who needs the service mapping can use the form to manage it and retrieve it from code. Please be noted that if no service mapping is present, NO order will be imported.
1. Click the “Edit”. 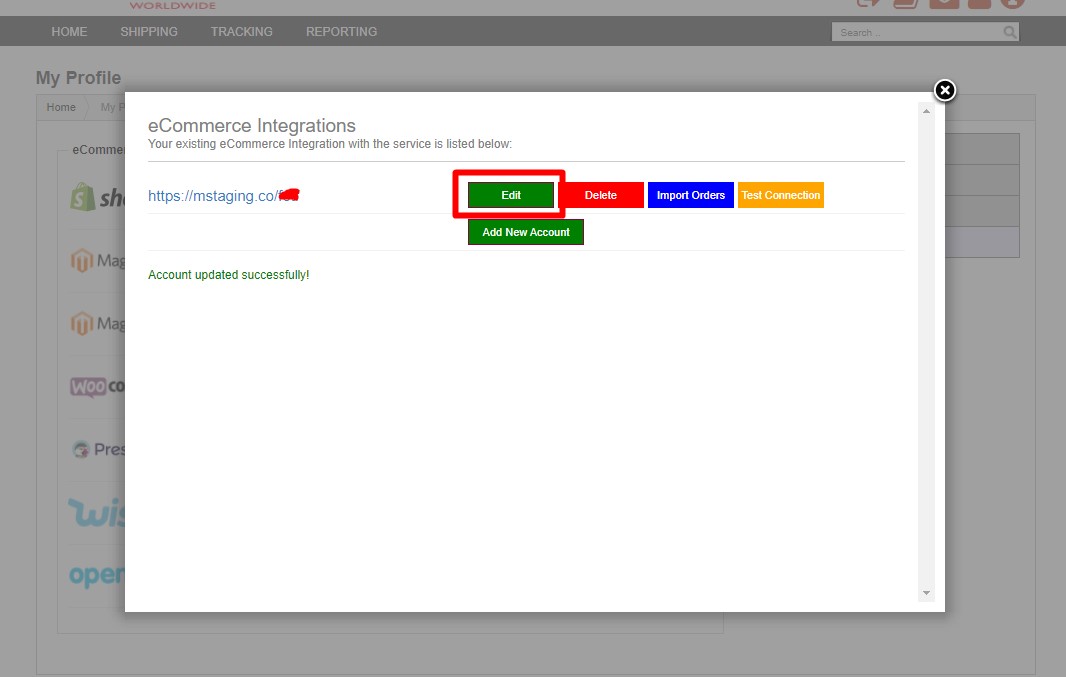
2. Then Insert the service code in the “From Service Code” and “To Service Code” textboxes, and click “Save Mapping” button. 
3. From Service Code :
For Woocommerce version > 2.6.x : follow the Shipping Methods Title (as highlighted in red below) under WordPress > WooCommerce > Settings > Shipping > Shipping Zones > select the zones you want)
*Rename your shipping method with a unique name, to ensure it is identifiable by the shipping provider when setup the service mapping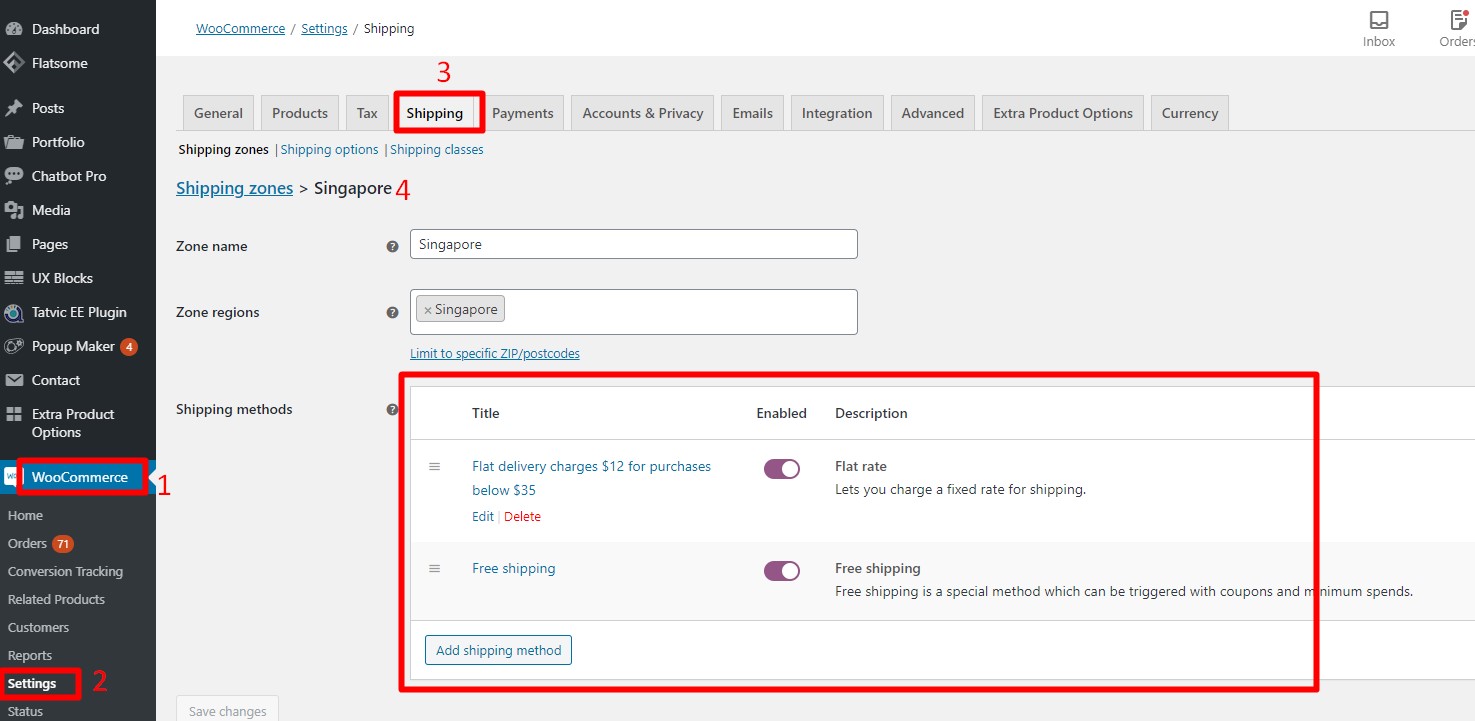
To Service Code: please check with support team to have your available service code(s)
For international
EXD – Express Document
EXP – Express Parcel
Local (SG)
DOM – Next Day Service
Only order with matched service mapping will be imported into GETOnline. If no service mapping is present, NO order will be imported.
1.2 Download and install Advance Shipment Tracking for WooCommerce plugin
1. After installing the plugin, go to WooCommerce > Shipment Tracking >Setting > then check the Display Track button on the Orders History list in customer accounts
2. Go to Shipping Provider and Choose DPEX as default
3. With these settings, you are able to see order automatically change to complete and you can see the tracking id automatically in the single’s order page.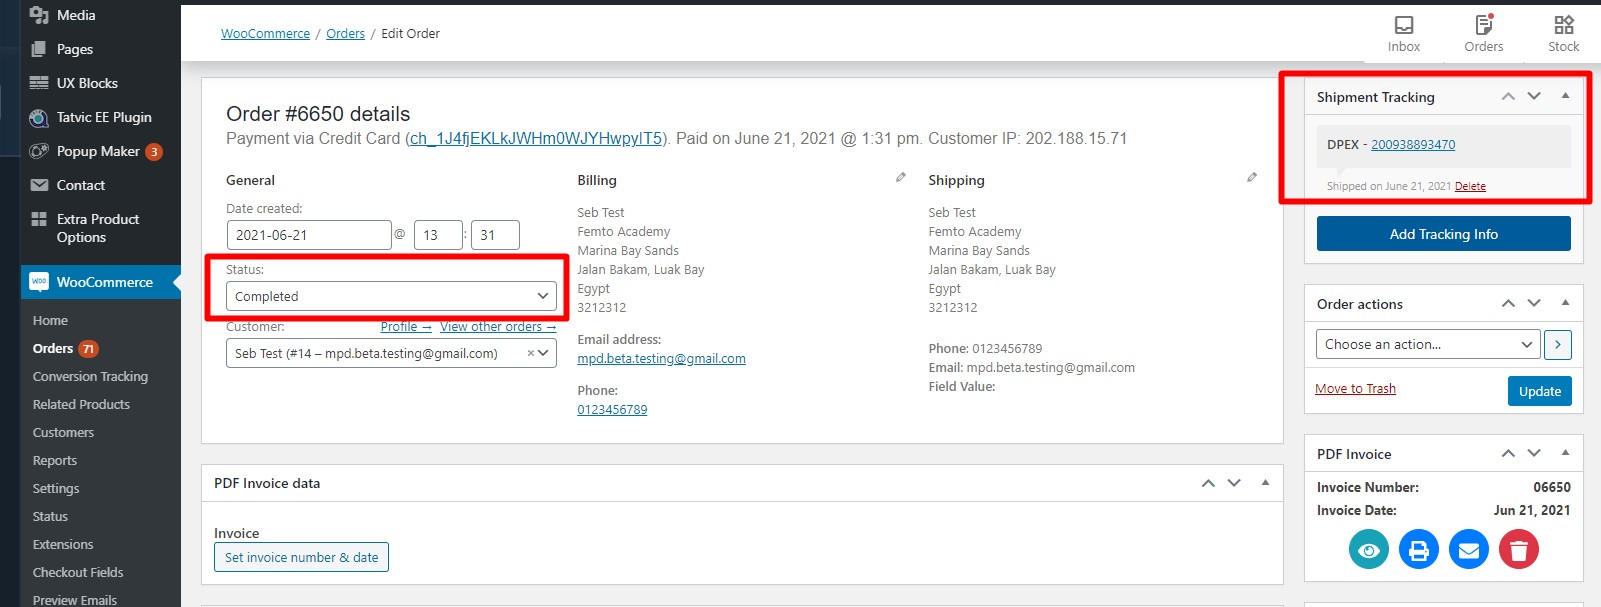
4. Customers are also able to track their order in the order history list inside of the my accounts section.
wordpress version 4.x.x and below